
Users can configure and modify a variety of features in Webex App to personalize how calls, meetings, and messages are managed and delivered. The following sections provide an introduction to the basics and key settings of Webex App for both desktop and mobile.
For more in-depth guidance on using all features, explore our full set of resources:
- Webex App support for desktop
- Webex App support for mobile
Download the BDV with Webex Application
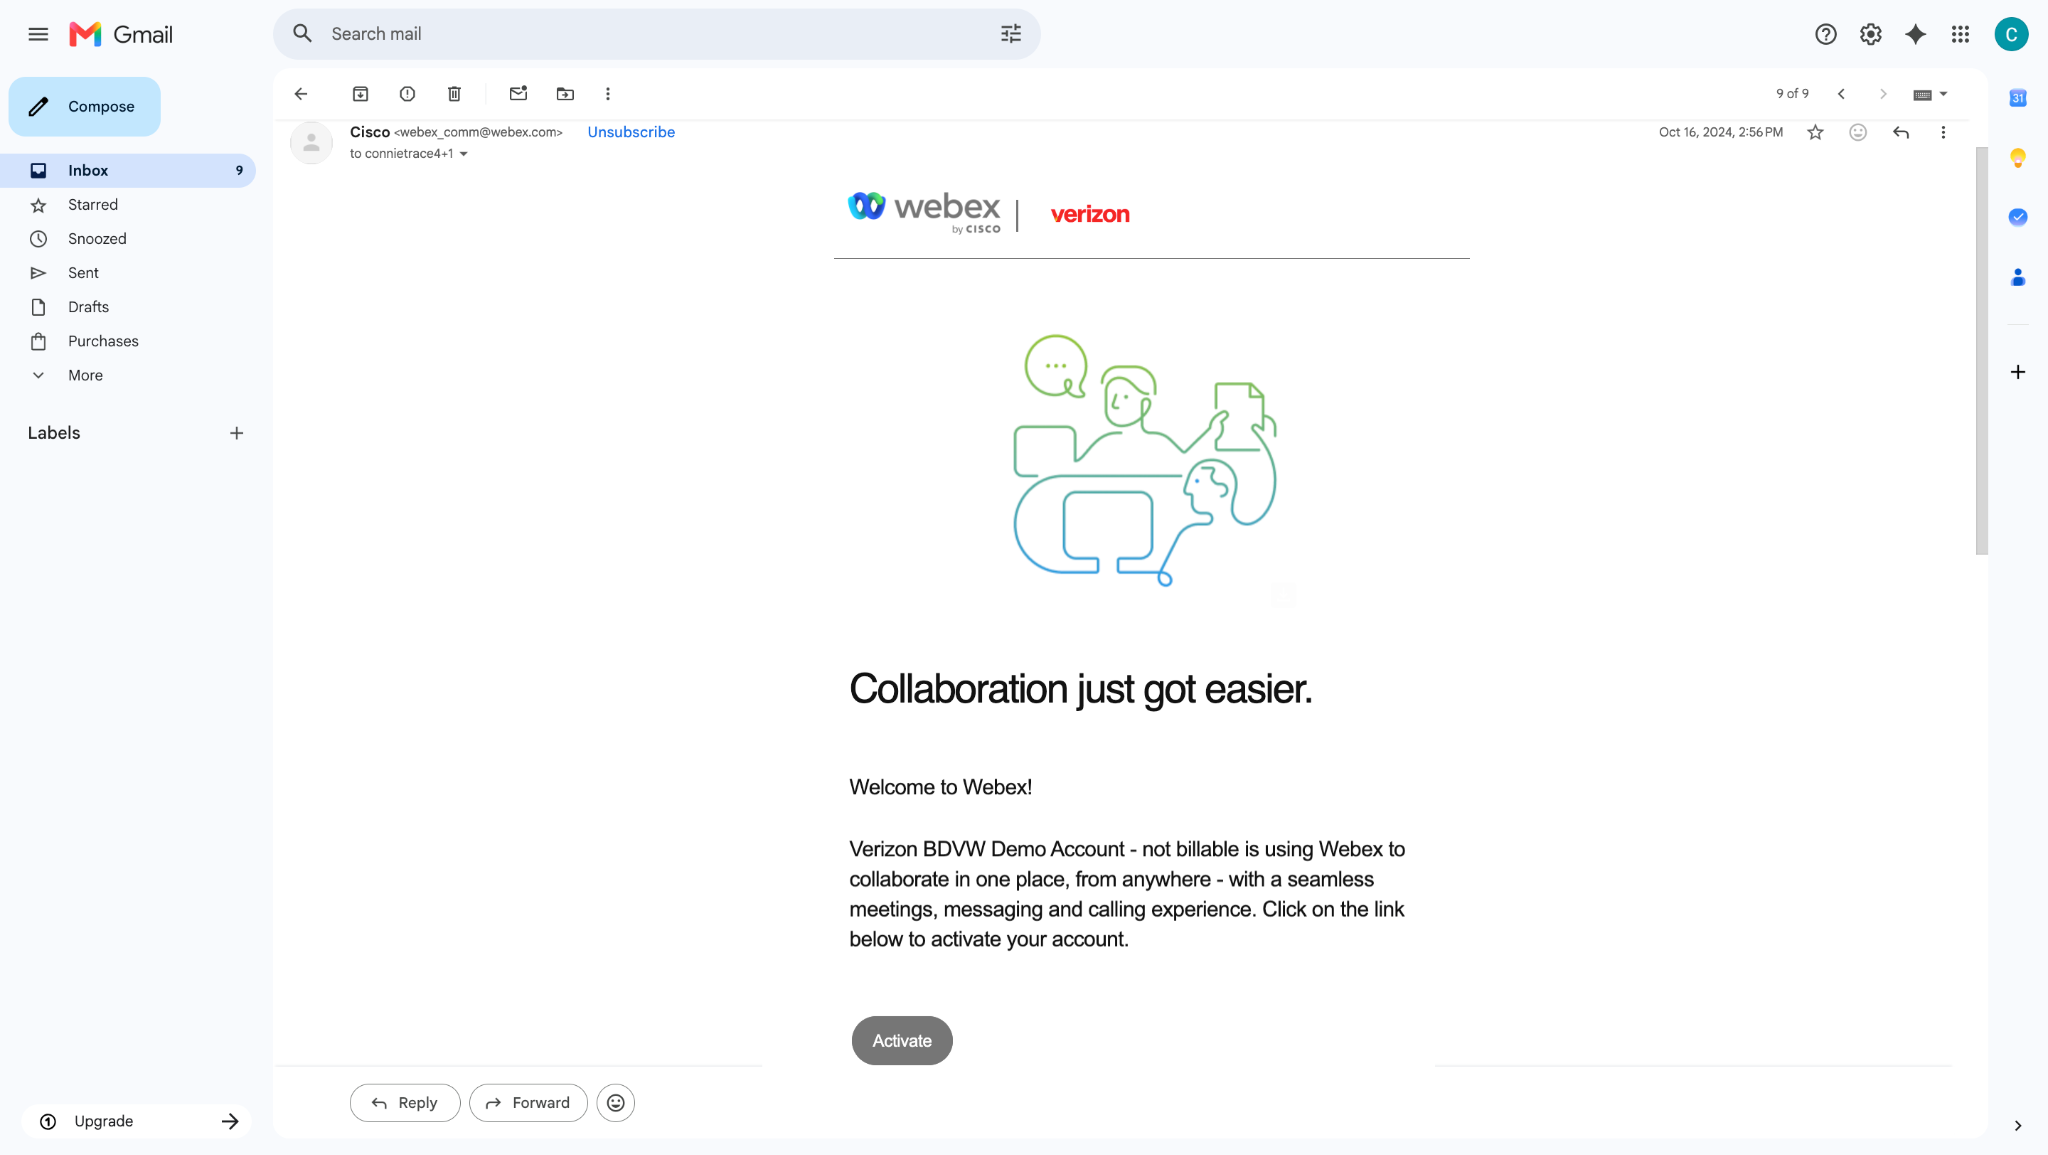
After successfully activating your account, one of the next steps is to download the Business Digital Voice with Webex application. This app will serve as your primary tool for messaging, meetings, and collaboration, ensuring seamless communication with your team.
- From your preferred browser, go to Webex.com.
- Select the correct download for your computer.
- Save the file.
- Locate and run the installer.
- When finished, open the application and enter your credentials.
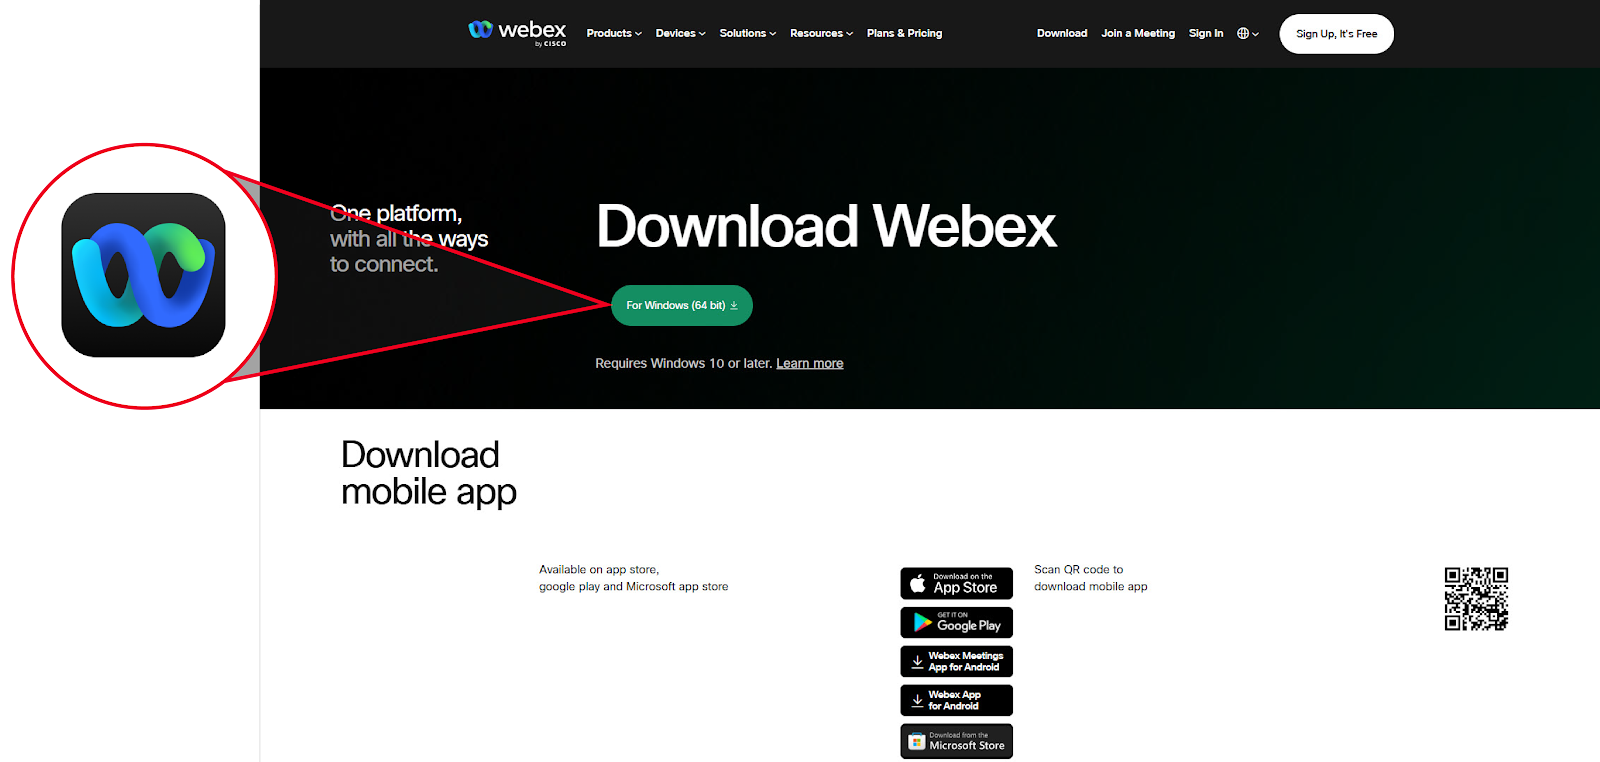
Overview of Business Digital Voice with Webex with Webex App
Let’s take a look at some of the main areas of this application:
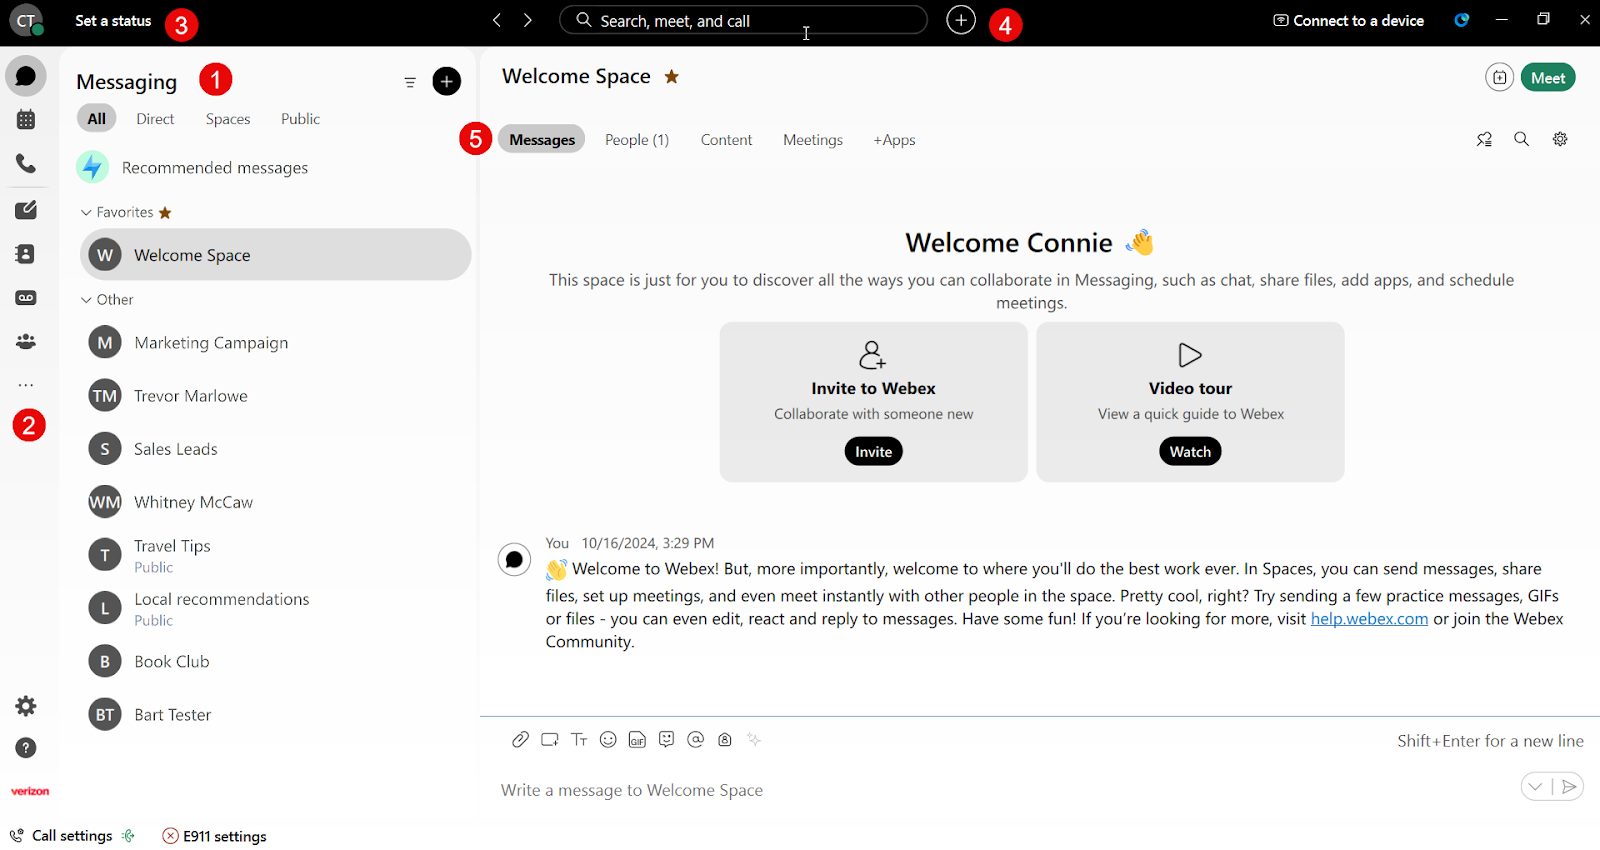
1. People and spaces list
This list is provided for easy access whenever required. Think of spaces as virtual rooms for ongoing collaboration with colleagues. At the top, you'll find your most recently active spaces. Any new teams or spaces you've been added to will also be displayed here. Additionally, a space name will appear in bold when a new message has been posted.
2. Navigation menu
You can switch easily between your message, team, call, and meeting views. Messages appear by default, but your teams, calls, and meetings are just a click away.
3. Profile and preferences
Within the app header, select your profile to modify your picture or name, access settings and preferences, and adjust your availability.
4. Search
In the app header, click the search bar to quickly find relevant information and access past meetings, recordings, and communication threads with just a few keywords.
5. Messages
The messaging feature goes beyond traditional text-based communication, offering a dynamic platform for real-time collaboration and information sharing within your teams.
6. AI Assistance
AI Assistant seamlessly integrates into the Webex App, providing user-friendly capabilities that enhance productivity, empowering you to connect, collaborate, and communicate effectively, while also automating routine tasks to elevate processes and work quality.
See when people are available and manage your availability status
You can view people's availability to see if they're actively using the app and manage your own availability.
See when people are available
You can view the availability of people within your organization. Their availability is visible alongside their profile picture, whether you're messaging them, seeing them in a space, or searching for them. A person's availability appears as active when they're using their computer. If they're away, the Business Digital Voice with Webex App shows when they were last active.
Below is the availability information displayed on profile pictures in the Webex App, listed in the order of precedence.
| Icon | Presence |
|---|---|
 | Airplane—Out of office reply is set in Microsoft Outlook |
| Hollow circle—Busy | |
| Red minus—Do not disturb | |
 | Moon—Quiet hours |
| | Away—Away from desk |
 | Arrow—Screensharing |
 | Meeting—In a meeting |
| Call—On a call | |
| Green icon—Active within the last 10 minutes | |
| Clock—Not active |
Manage your availability
You have two options when managing your availability: Do Not Disturb (DND) and Busy.
Set your status to Do Not Disturb (DND) to work uninterrupted without receiving messages or call notifications, or set it to Busy to let colleagues know you're focused while still receiving notifications.
To change your availability:
- Click your profile picture and select Availability.
- Choose either Busy or Do not Disturb.
- Set one of the following:
- Select the duration to enable your availability from the list.
- Click Custom… to choose a specific time.
- To set your availability back to active, click your profile picture and select Availability. Then click Clear.
Upload your profile picture
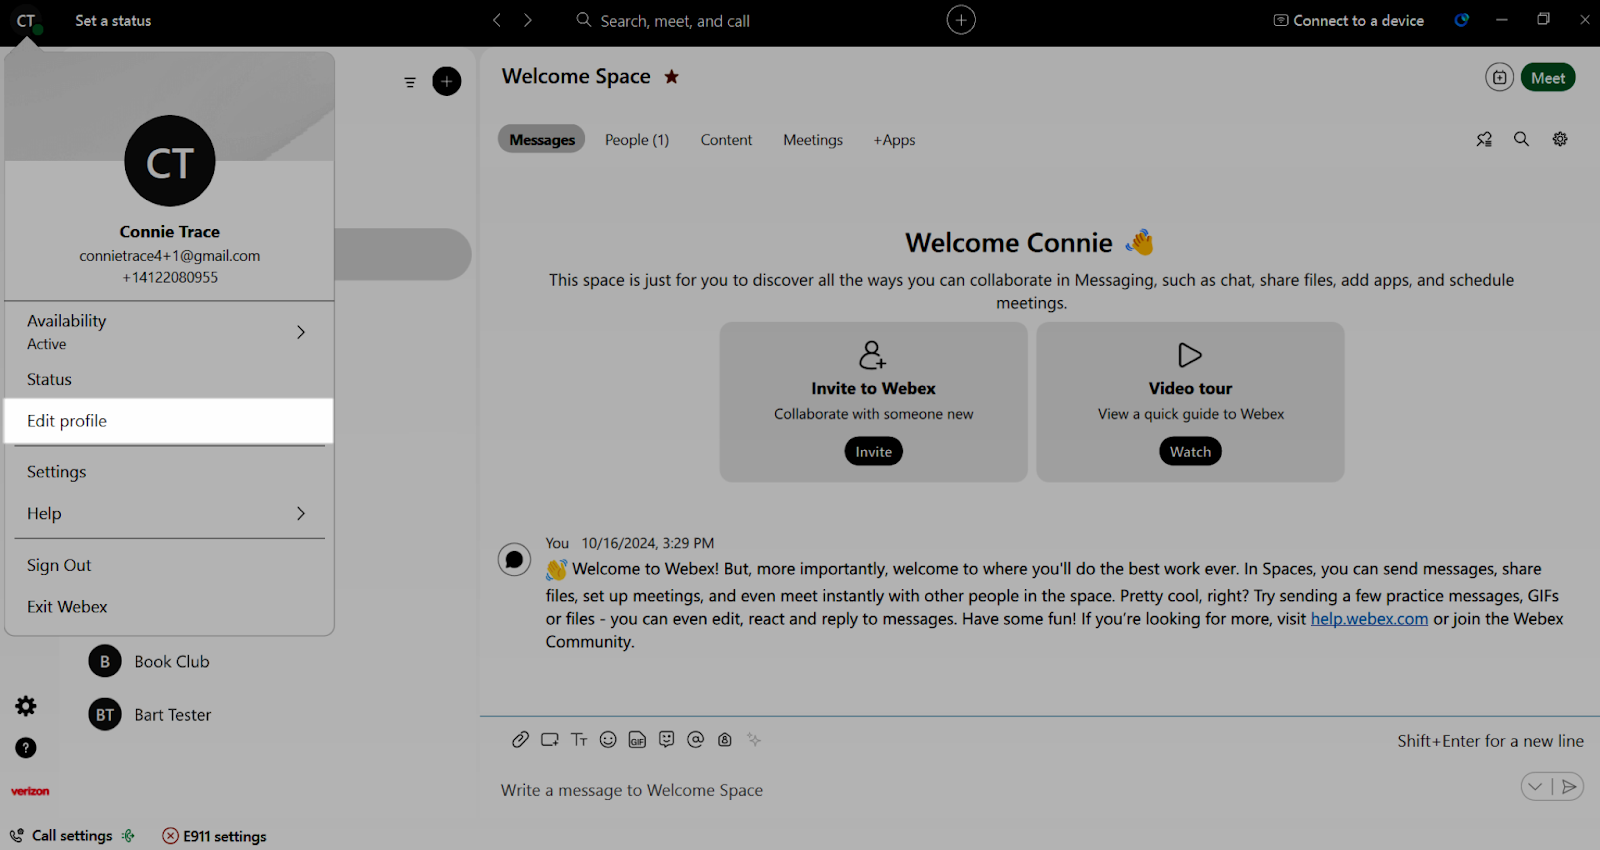
In Webex, make it easier for individuals to identify you by adding an image to your profile. Your profile depicts only your initials within a circle before you upload one. To upload your picture:
- In the app header, click your profile picture or initials.
- Click Edit profile, then go to the Profile picture section.

- Click Upload picture to browse for an image to upload.
- When you've made your changes, click Save.
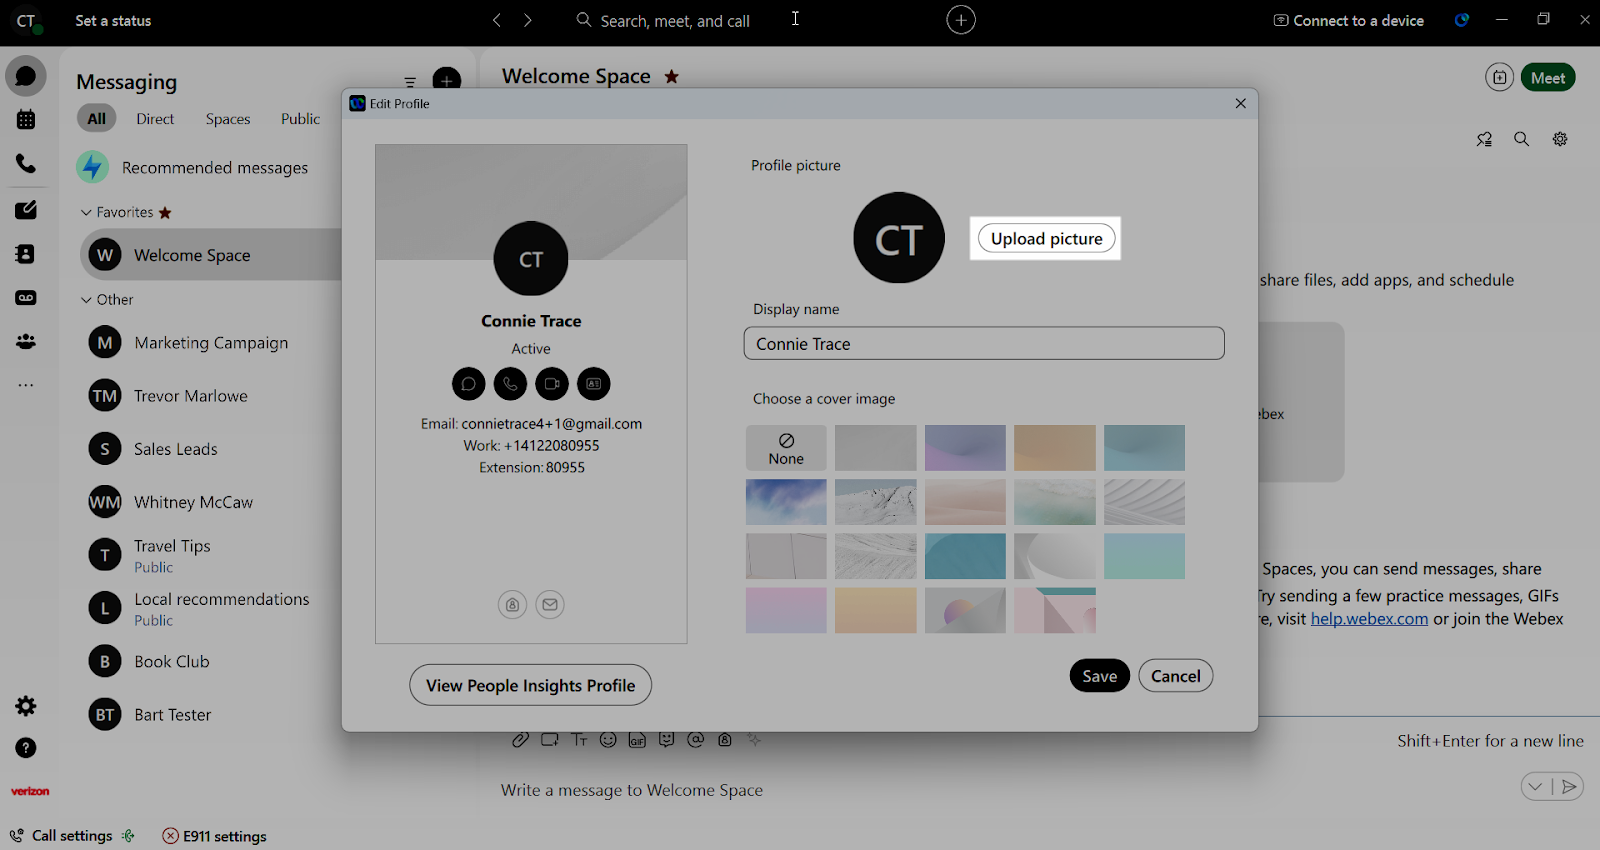
Update your display name
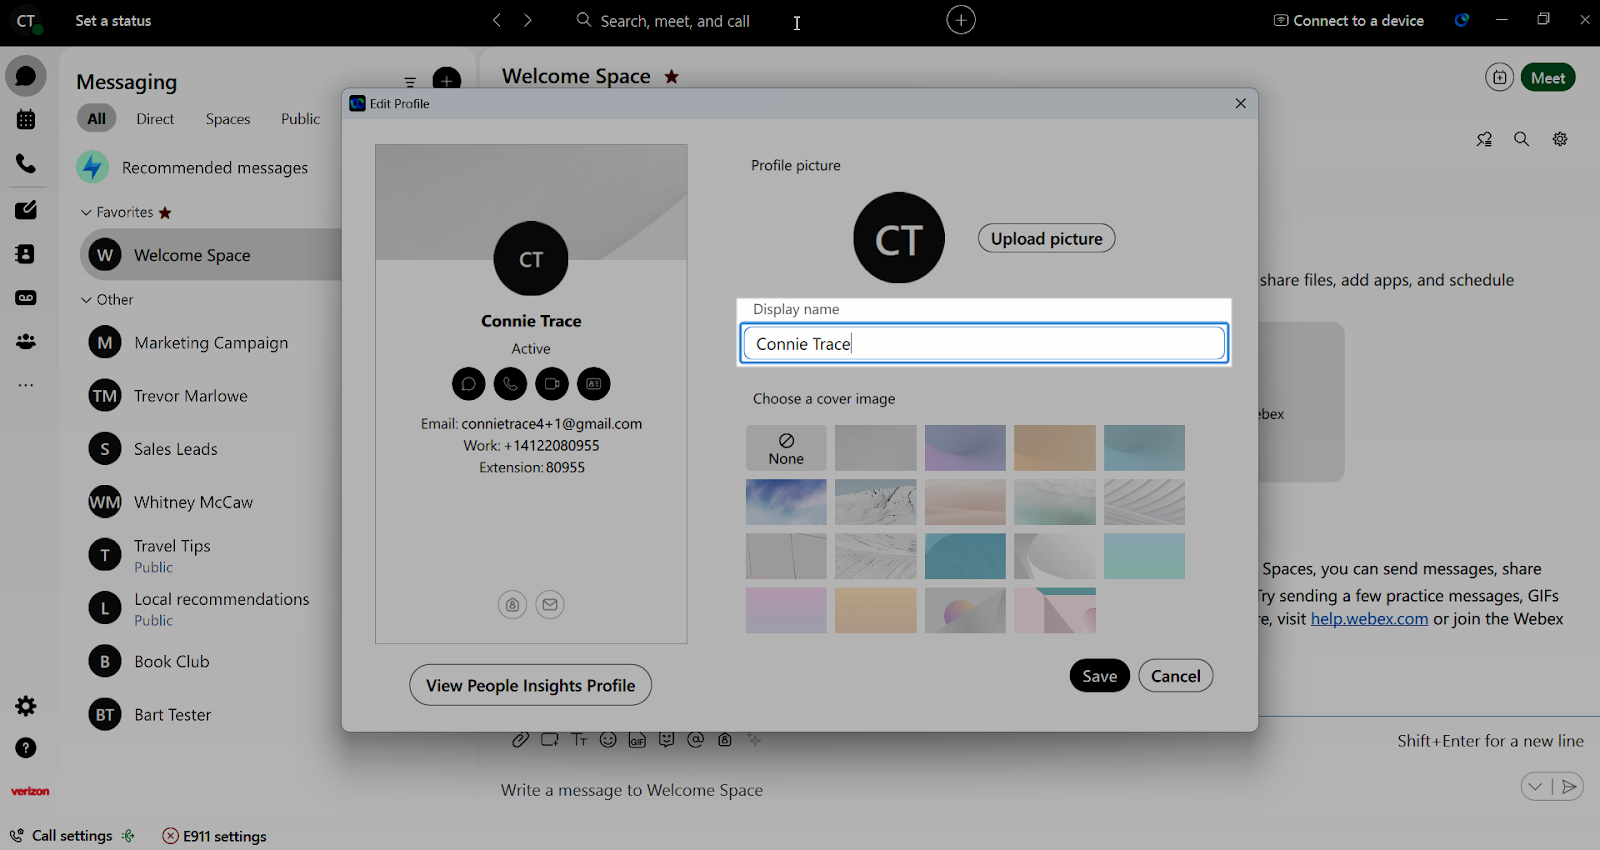
You can change the name of your Webex profile to show your preferred name. To update your display name:
- In the app header, click on your profile picture or initials.
- Click Edit profile.
- Go to the Display name section.
- Click on your name and make your changes.
- Click Save.
Set a custom status
Create and post a unique status, so that your co-workers know if you’re away, working from home, or preparing for an important meeting. To set a custom status:
- In the app header, click Set a status.
- You can choose a status already entered, or you can enter a new status in the status field.
Note: You can add up to five status options to the list, so they are quickly available. Each status has a maximum length of 75 characters and can also include emojis. - To remove an existing status, select the X and click Save.
Download the BDV with Webex Application
After successfully activating your account, one of the next steps is to download the Business Digital Voice with Webex application. This app will serve as your primary tool for messaging, meetings, and collaboration, ensuring seamless communication with your team.
To download the Webex app to your iPhone, you must first activate the email address that you want to use with your account. Ask your site administrator or account manager for your activation link.
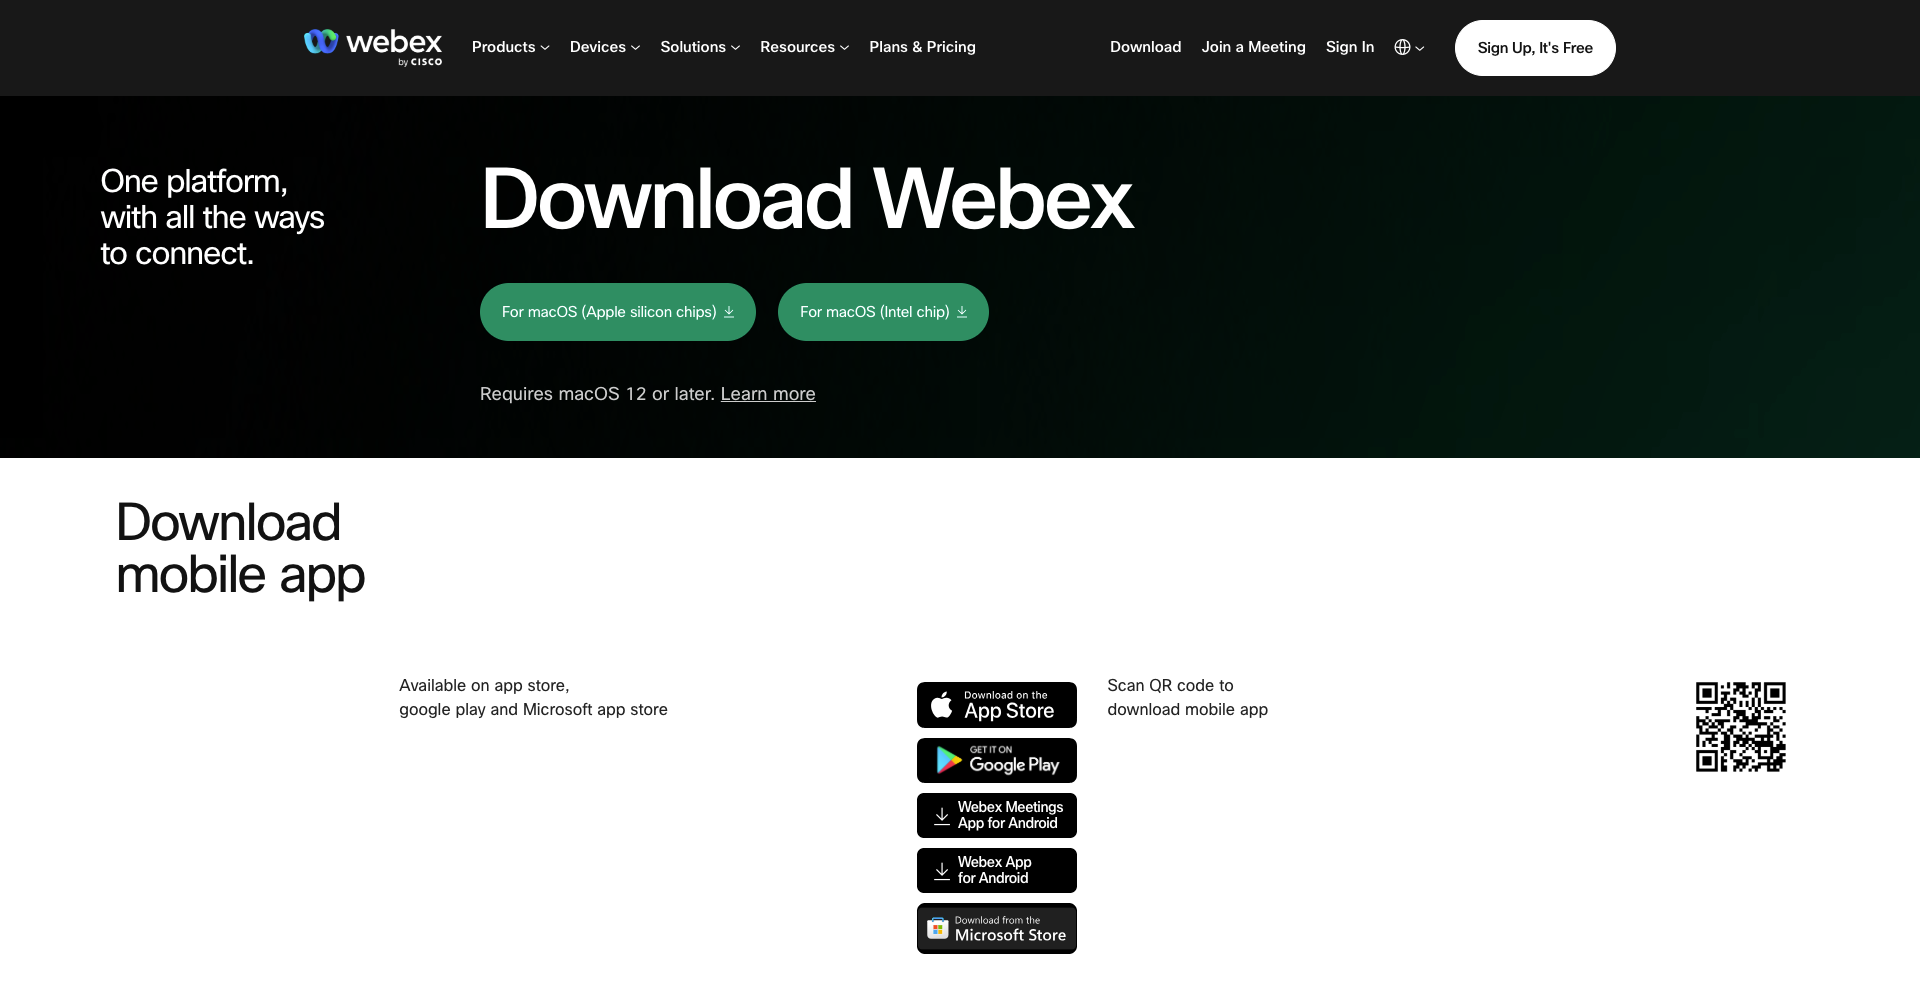
You can download the Webex app to your iPhone directly from the App Store or by scanning a QR code from your desktop browser.
To download the Webex app from the App Store:
- Open the App Store on your iPhone.
- Search for and select Webex for Business.
- Tap Get to download and install the app.
- Once installed, tap Open to launch the app.
- Review and accept the End User License Agreement.
To download the Webex app by scanning a QR code:
- On your desktop browser, navigate to webex.com/downloads.html.
- Scan the QR code on the page using your iPhone camera.
- Follow the prompts to download and install the app.
Overview of BDV with Webex App
Let’s take a look at some of the main areas of this application:
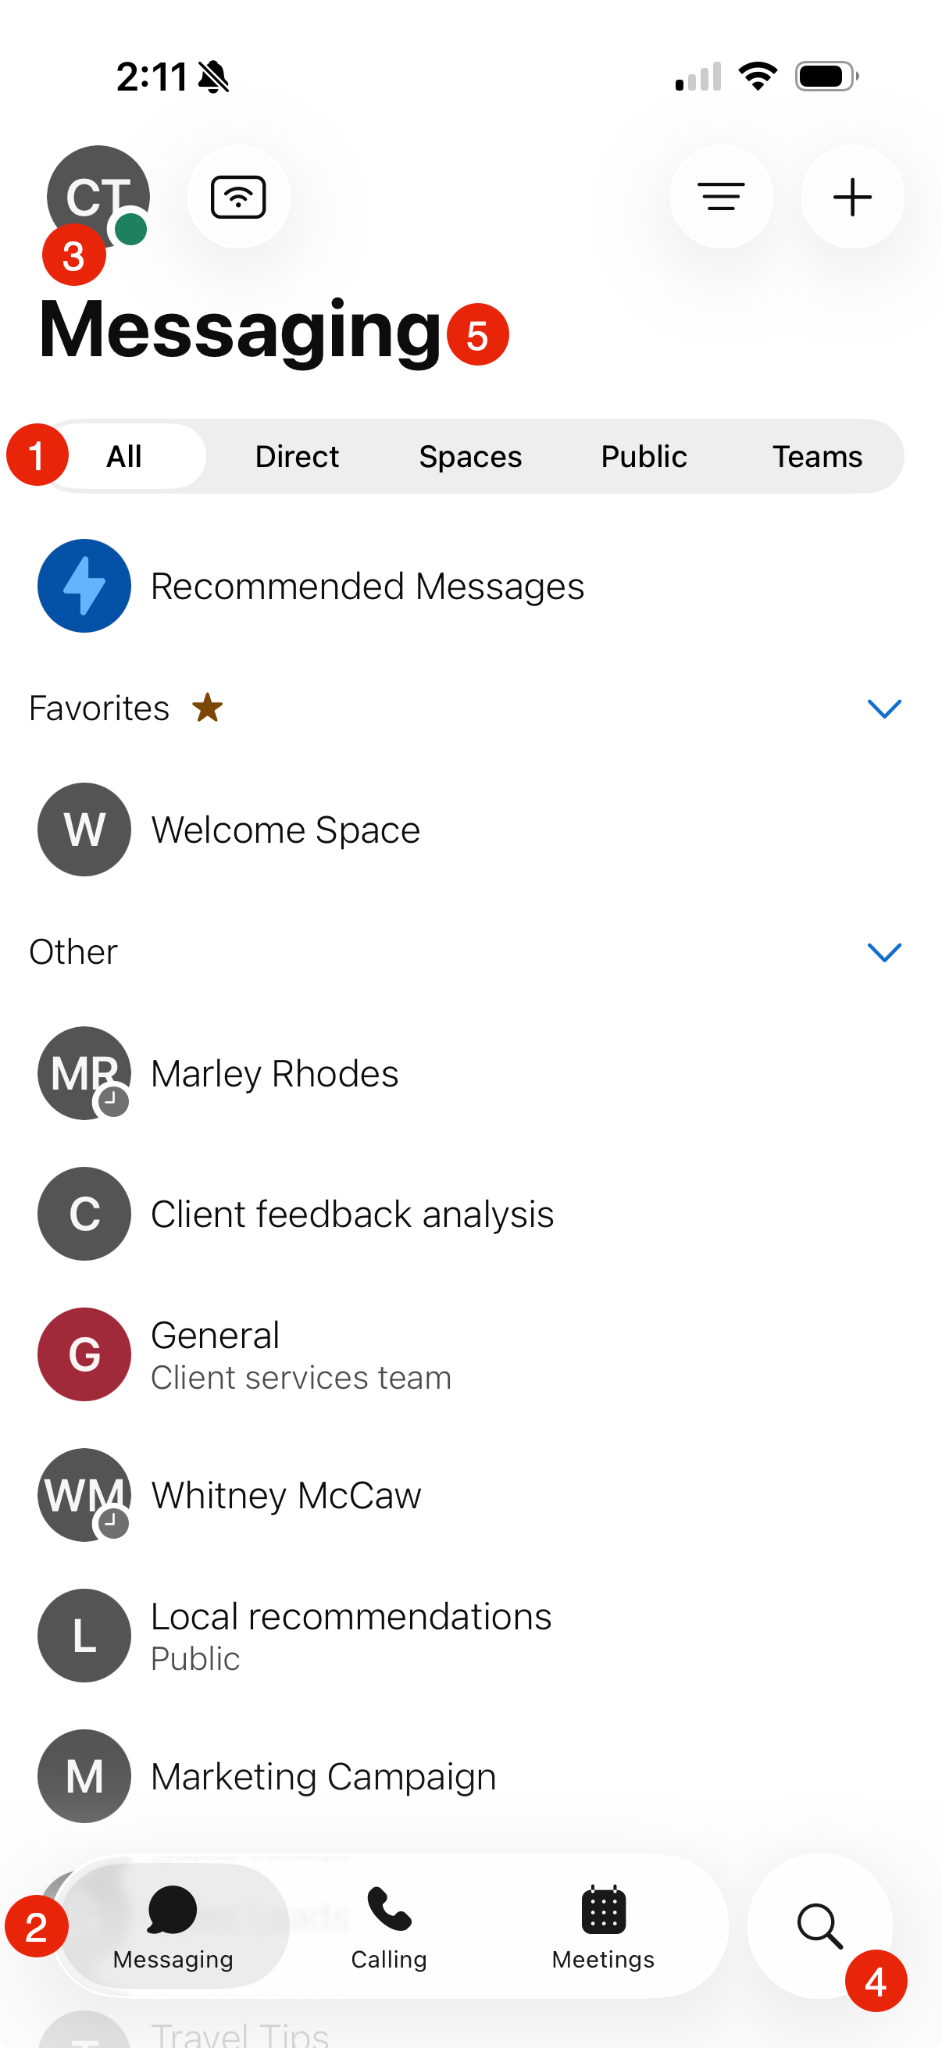
1. People and spaces list
People and Spaces appear on the main screen after login. Tap the Messaging icon at any time to return to this screen. Think of spaces as virtual rooms for ongoing collaboration with colleagues. At the top, you'll find your most recently active spaces. Any new teams or spaces you've been added to will also be displayed here. Additionally, the space name appears in bold when a new message is posted.
2. Navigation menu
You can switch easily between your message, team, call, and meeting views. Messages appear by default, but your teams, calls, and meetings are just a click away.
3. Profile and preferences
Within the app header, select your profile to modify your picture or name, access settings and preferences, and adjust your availability.
4. Search
Tap the search icon to quickly find relevant information and access past meetings, recordings, and communication threads with just a few keywords.
5. Messages
Send messages, share files, and collaborate securely with your team, right from your phone.
Manage Webex App features
Upload your profile picture
In Webex, make it easier for individuals to identify you by adding an image to your profile. Your profile depicts only your initials within a circle before you upload one. To upload your picture:
- In the app header, tap on your profile picture or initials.
- Tap your profile picture or initials again.
- The Edit Profile screen appears. Tap Add picture. Note: If you already have a profile picture, click Update picture to update it.

- Either choose an existing photo from your photo gallery, take a photo, or have AI generate a photo for you.
- Once complete, tap Save.
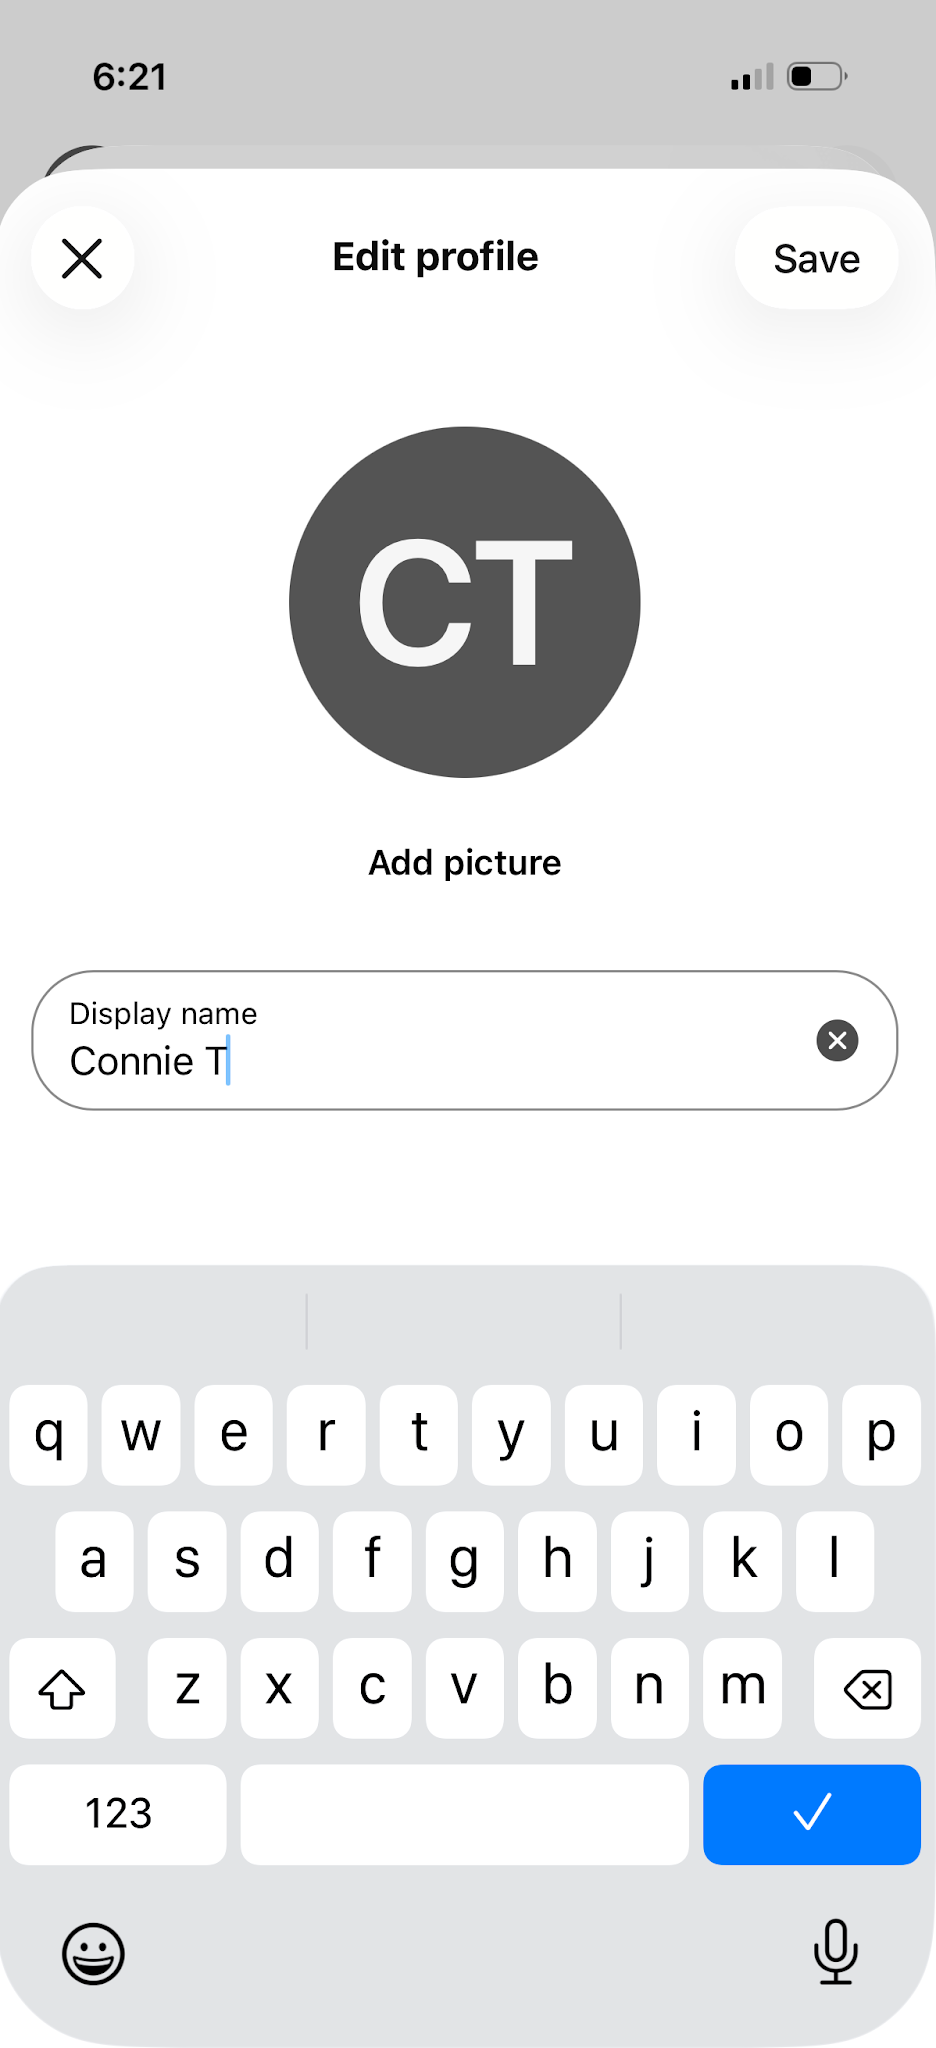
Update your display name
You can change the name of your Webex profile to show your preferred name. To update your display name:
- In the app header, tap on your profile picture or initials.
- Tap your profile picture or initials again.
- The Edit Profile screen appears. Tap on your name and make your changes
- Click Save.
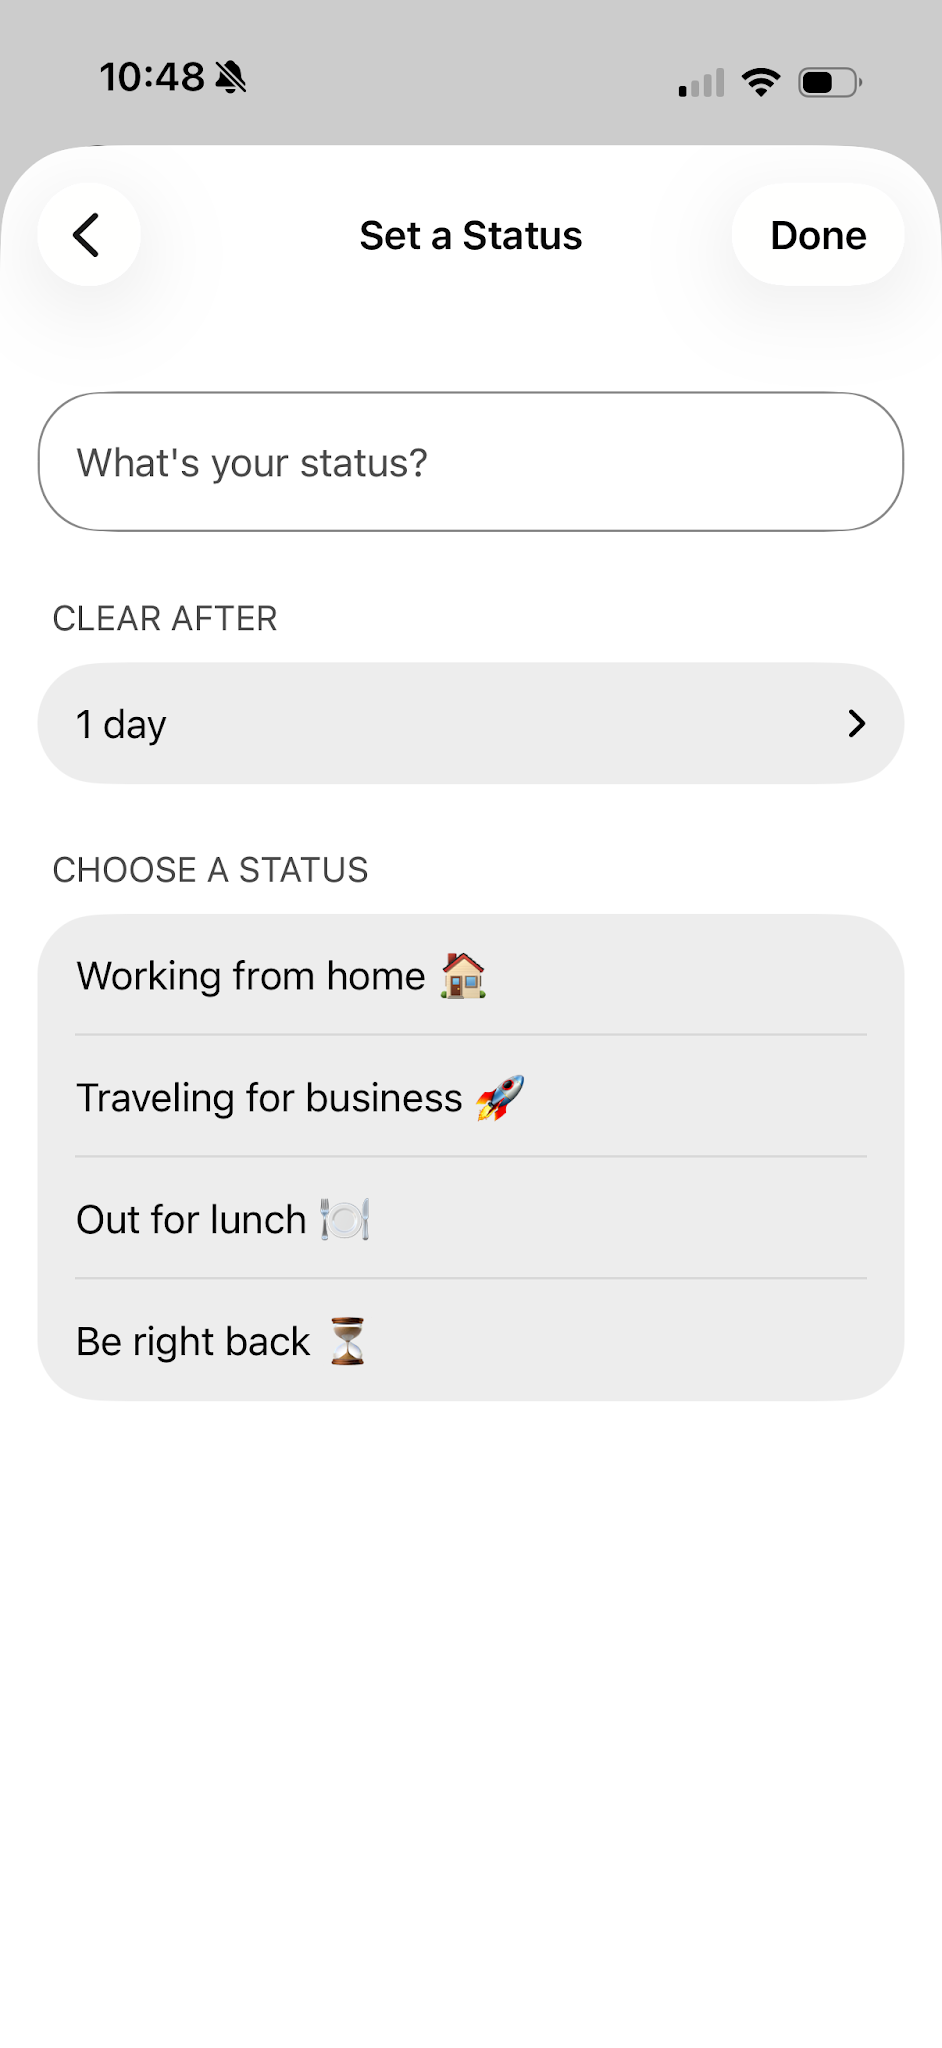
Set a custom status
Create and post a unique status, so that your co-workers know if you’re away, working from home, or preparing for an important meeting. To set a custom status:
- In the app header, tap on your profile picture and tap Set a Status.
- You can select a status from the list or create a new status by typing it into the Type Your New Status text field.
- Tap Done when finished.
Note: You can add up to five status options to the list, so they are quickly available. Each status has a maximum length of 75 characters and can also include emojis.