
Get up to speed quickly with training resources that help end users learn key features, complete common tasks, and make the most of their tools.
Users can configure and modify a variety of features related to their Webex Calling services to personalize how calls and meetings are managed and delivered. The sections below highlight some of the most commonly adjusted settings.
For a complete list of available features and step-by-step instructions for configuring them, refer to our Business Digital Voice with Webex with Webex end user support resources.
Access User Hub
User Hub enables you (end users) to manage and configure the user features and settings of your service, such as checking your voicemails and setting up mobility settings.
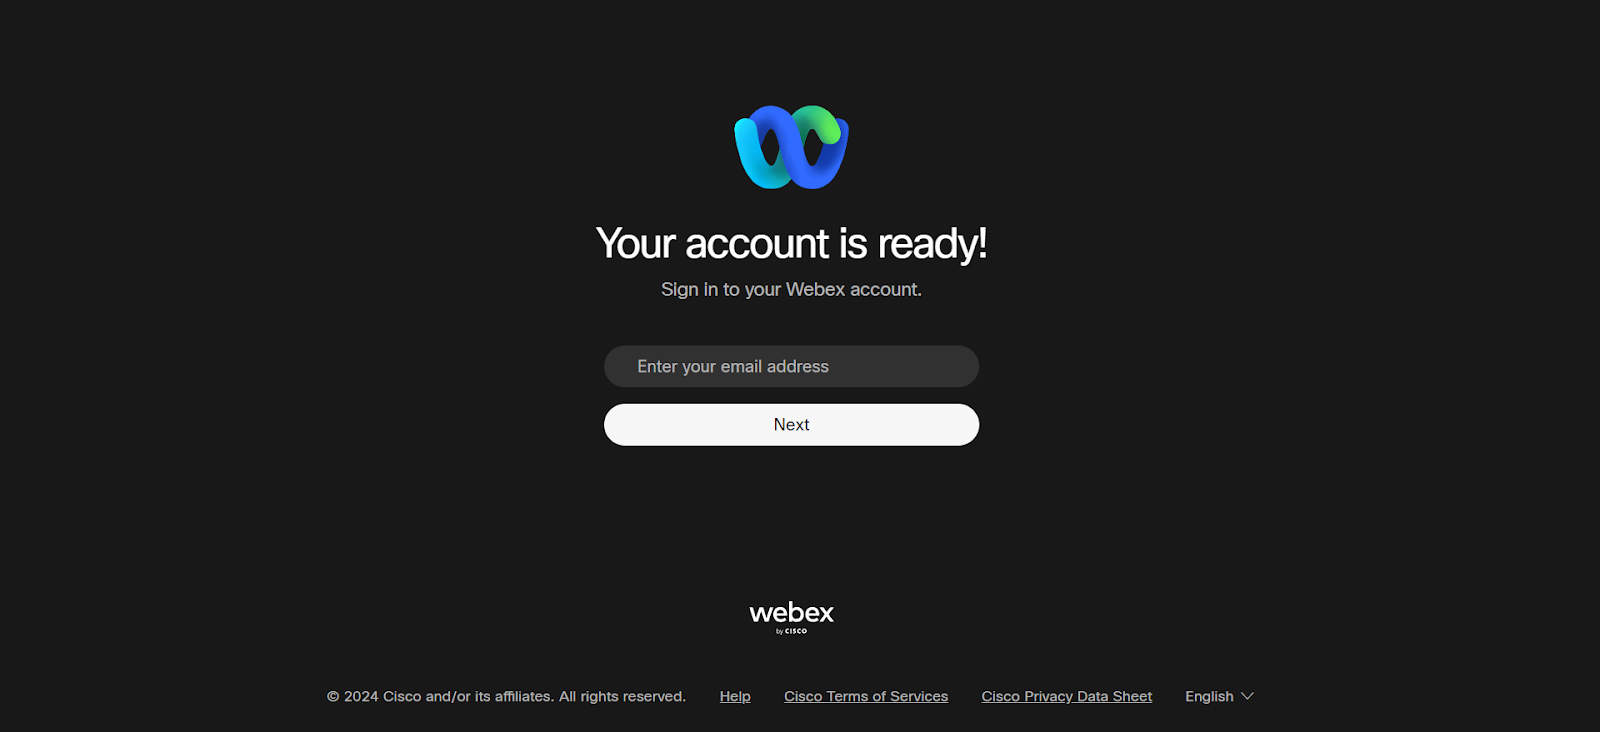
Once your administrator has set you up as a user, you will receive an email to access the User Hub through Cisco Webex.
- From your preferred browser, go to User Hub.
- Enter your email address.
- Click Next.
- Enter your password.
- Click Sign in.
If you are a new user, you will follow the link sent to you by your administrator to your work email and follow the steps to set up your account.
For more information on updating your profile settings, including basic, security, and additional options, refer to this guide.
Enable do not disturb
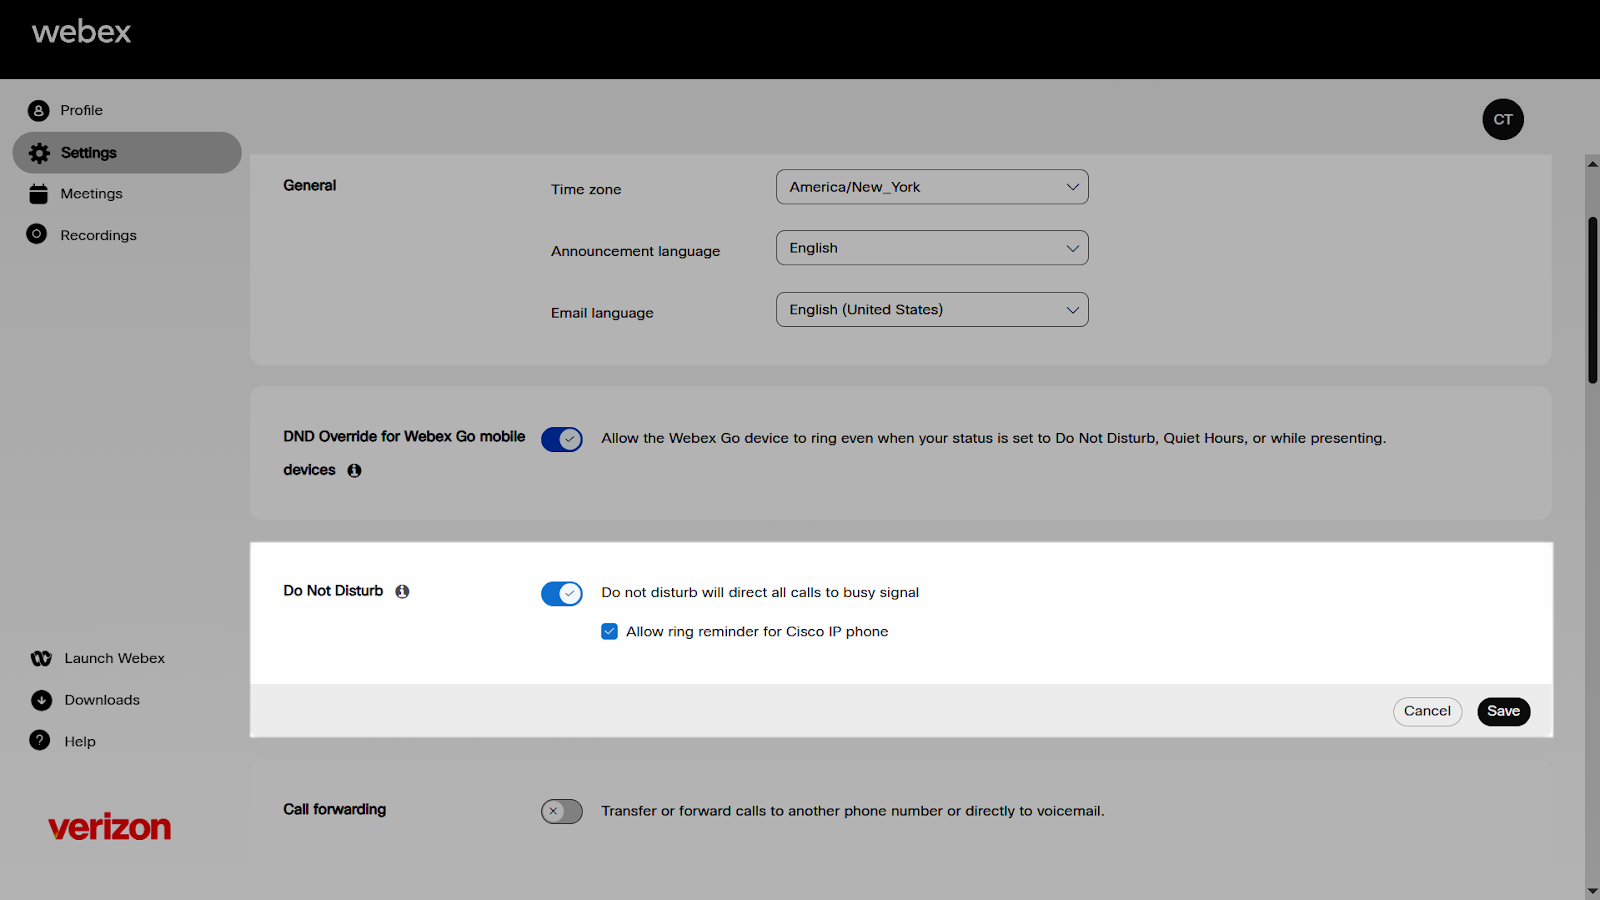
The do not disturb feature gives all incoming calls the busy treatment, when enabled. Optionally, you can enable a ring reminder to play a brief tone on your phone when you receive incoming calls.
- Sign in to User Hub.
- Click Settings > Calling > Call settings.
- Navigate to Do Not Disturb and click the toggle button to enable it.
- Check Allow ring reminder for Cisco IP phone to play a ring reminder if you want to play a sound notification when a call comes through.
- Click Save.
Enable or disable call waiting
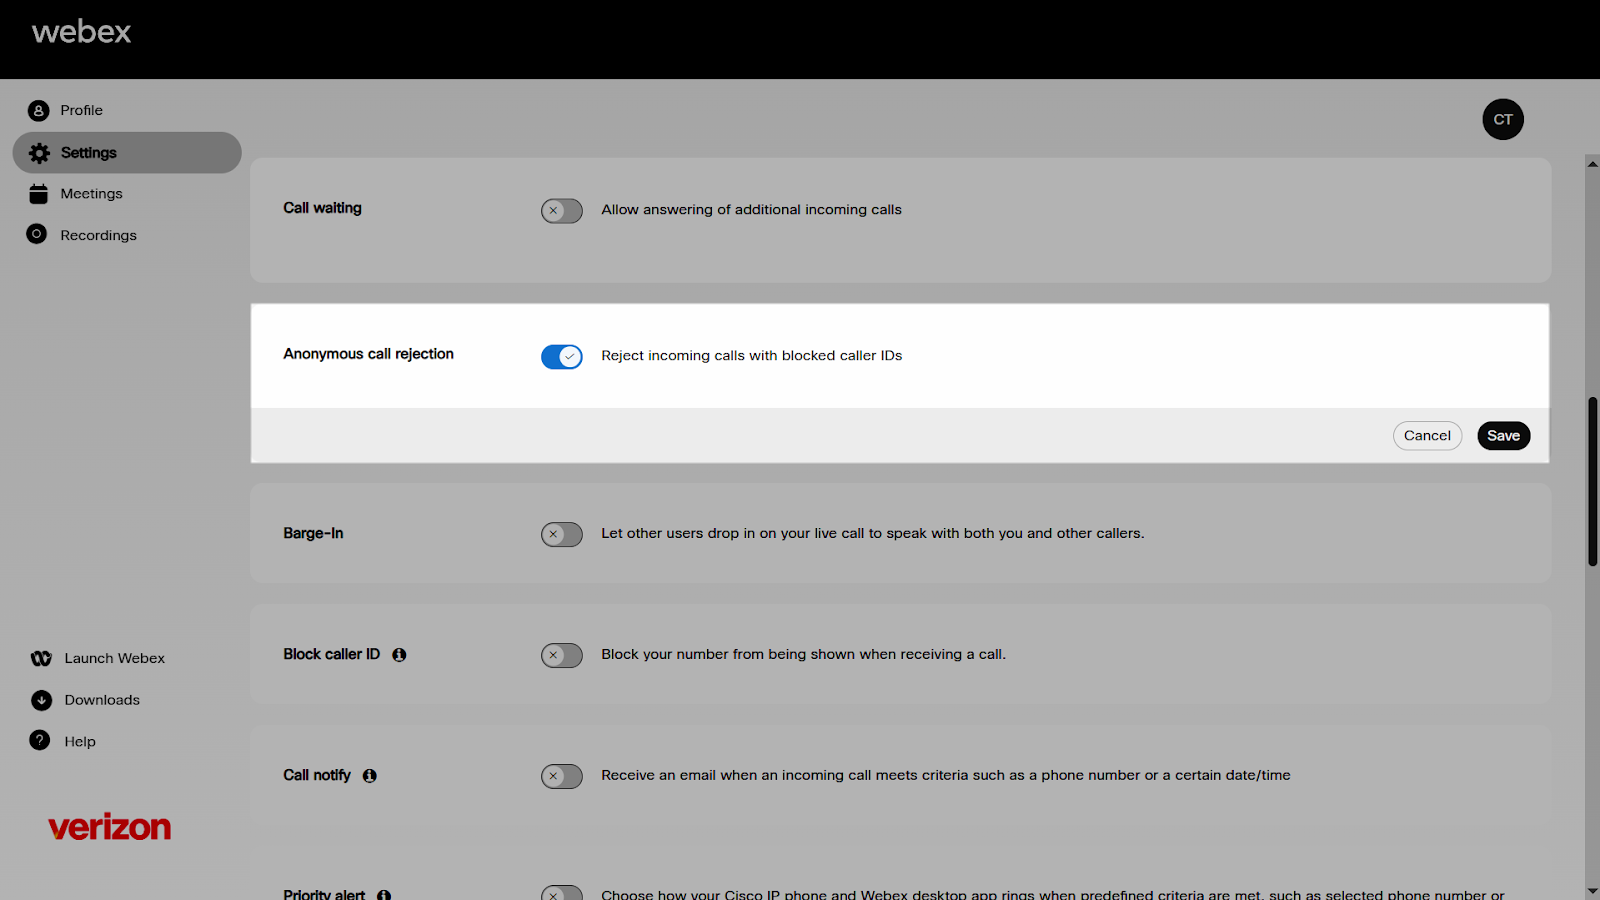
The call waiting feature allows you to place a call on hold to answer a different call. When you are on an active call, a tone alerts you of a new call, and you can choose to answer or ignore the call.
- Sign in to User Hub.
- Click Settings > Calling > Call settings.
- Navigate to Call waiting and click the toggle button to enable it. To disable it, click the toggle button again.
- Click Save.
Forward your calls
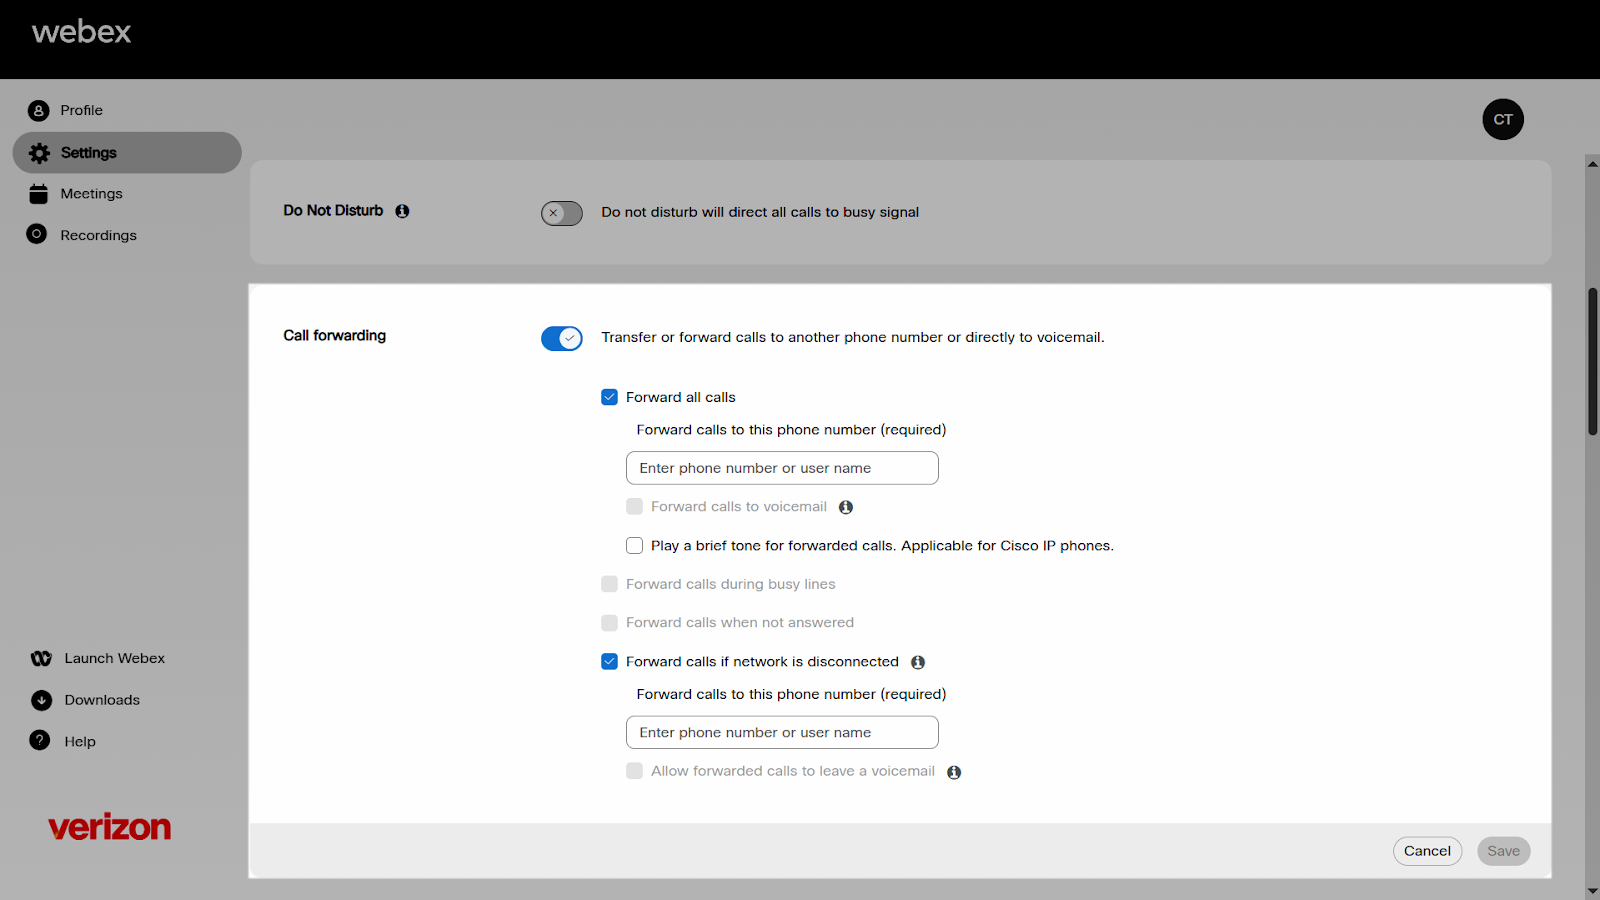
If you're going to be away from your desk but don't want to miss an important phone call, you can forward your calls to another phone number through User Hub.
- Sign in to User Hub.
- Click Settings > Calling > Call settings.
- Navigate to Call forwarding and click the toggle button to enable it. To disable it, click the toggle button again.
- Select the call forwarding option you would like to use.
- Forward all calls – Forwards all calls to the number you enter.
- Forward calls during busy lines – Forwards all calls to the number you enter when your line is busy.
- Forward calls when not answered – Forwards all calls to the number you enter when you are away or not answering your phone.
- Forward calls if network is disconnected (Business Continuity) – Forwards incoming calls to a specified number if clients or devices aren’t connected due to power outages or network issues.
- Enter a number to forward calls to.
- Check Forward calls to voicemail only if the number you entered is an internal phone number or extension and the number has voicemail enabled.
- Enable Play a brief tone for forwarded calls (a notification sound is played), if applicable. This applies to Cisco IP phones.
- Click Save.
View and manage your Webex meeting settings
You can view and manage your Webex App meeting settings in User Hub.
To view and manage your meeting settings:
- Sign in to User Hub.
- Click Settings > Meetings.
General
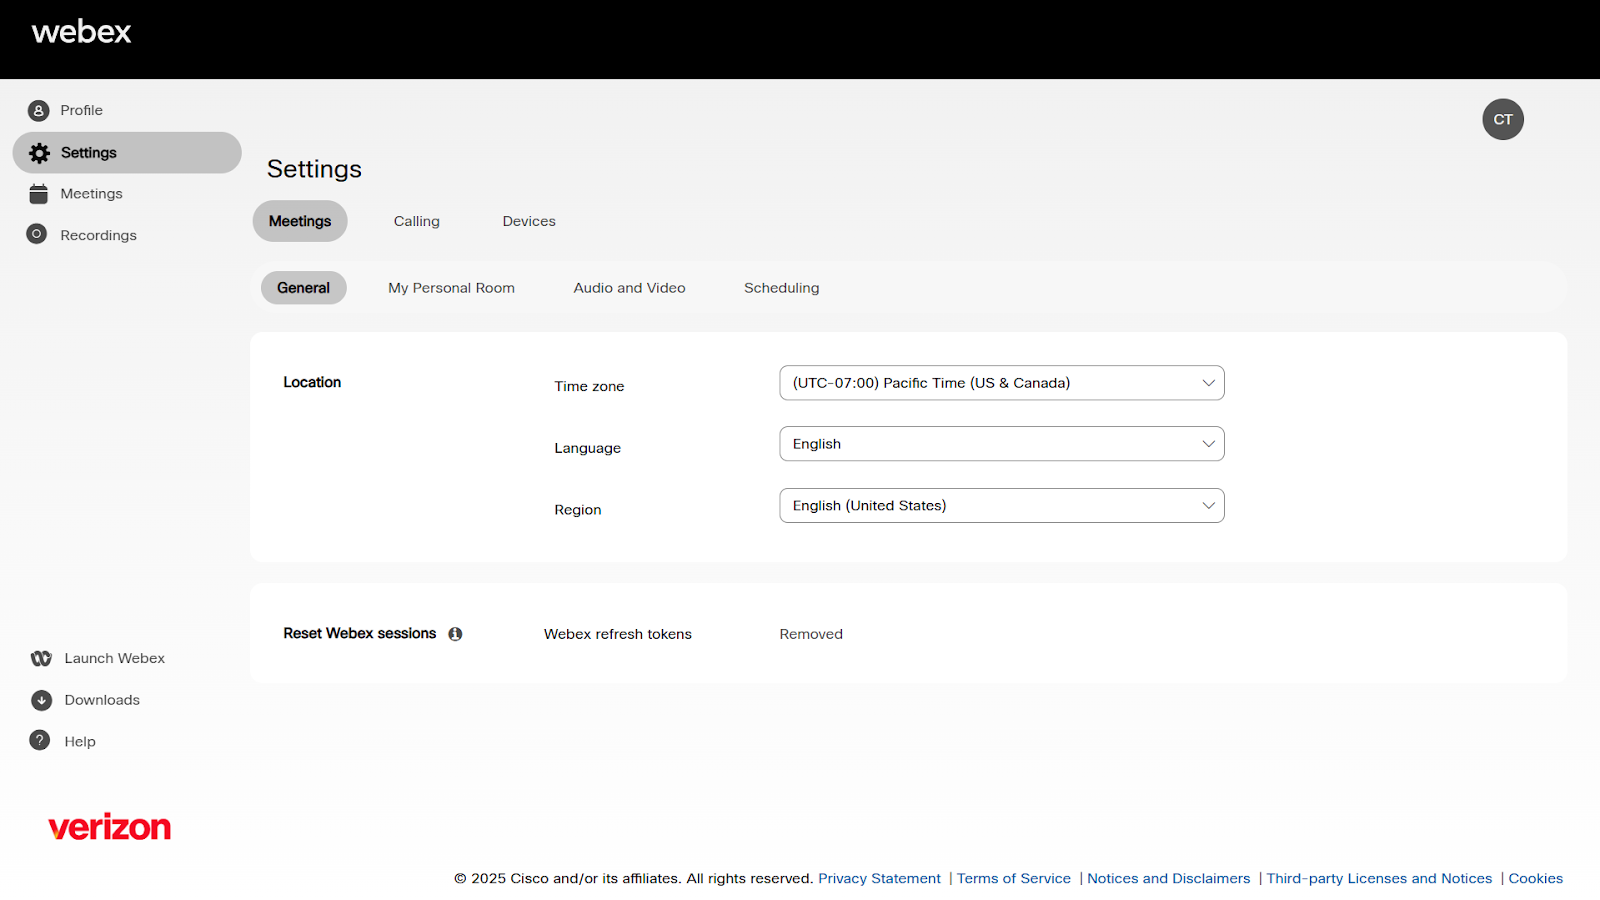
On the general tab, you can customize preferences to fit your needs. Change things like language, time zone, or region. Use the drop-downs corresponding to each section to make your selections. If changes have been made, please click Save to confirm.
For more information on managing your Personal Room, modifying audio and video settings, and scheduling meetings, refer to this guide.
Manage your calendar meetings
The calendar tab lets you start, join, and schedule meetings. View upcoming and completed meetings using the provided filters and date ranges. You can use your Personal Meeting Room ID to join meetings. It appears under Calendar and can be copied and shared with other users.
This feature must be set up by your administrator. If you don’t see this in User Hub, contact your administrator.
View upcoming and completed meetings
To view upcoming and completed meetings, follow these steps.
- Sign in to User Hub.
- Click Meetings.
- Select Upcoming to view scheduled meetings that have not yet taken place.
Select the meeting type from the drop-down menu and choose the date range. Check the box to show earlier meetings and webinars if desired. - Click Join to join the meeting when ready.
You can use the search bar to help you locate and join a meeting, and search for transcripts if applicable.

Start, join, or schedule meetings
To start a meeting:
- Click Meetings.
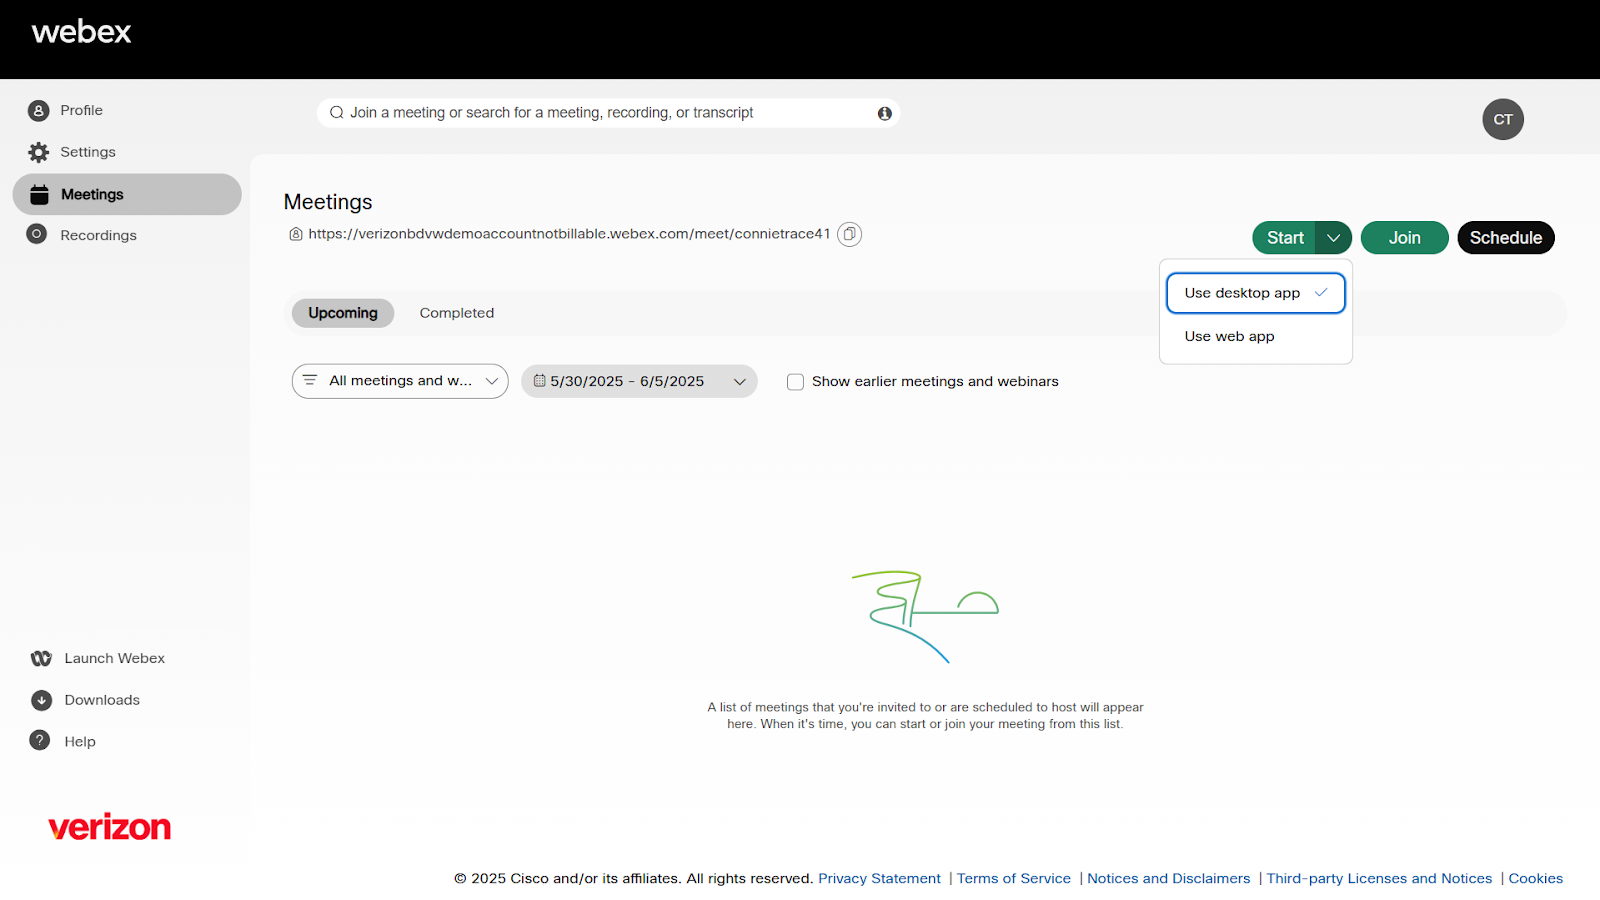
- Select Start to launch Webex App or expand the chevron arrow to choose to meet from the web app.
- Configure meeting preferences and start your meeting.
To join a meeting:
- Click Meetings.
- Select Join.
- Enter a name to search for a person’s Personal Room or enter a meeting ID or video address.
- Click Join to join the meeting when ready.
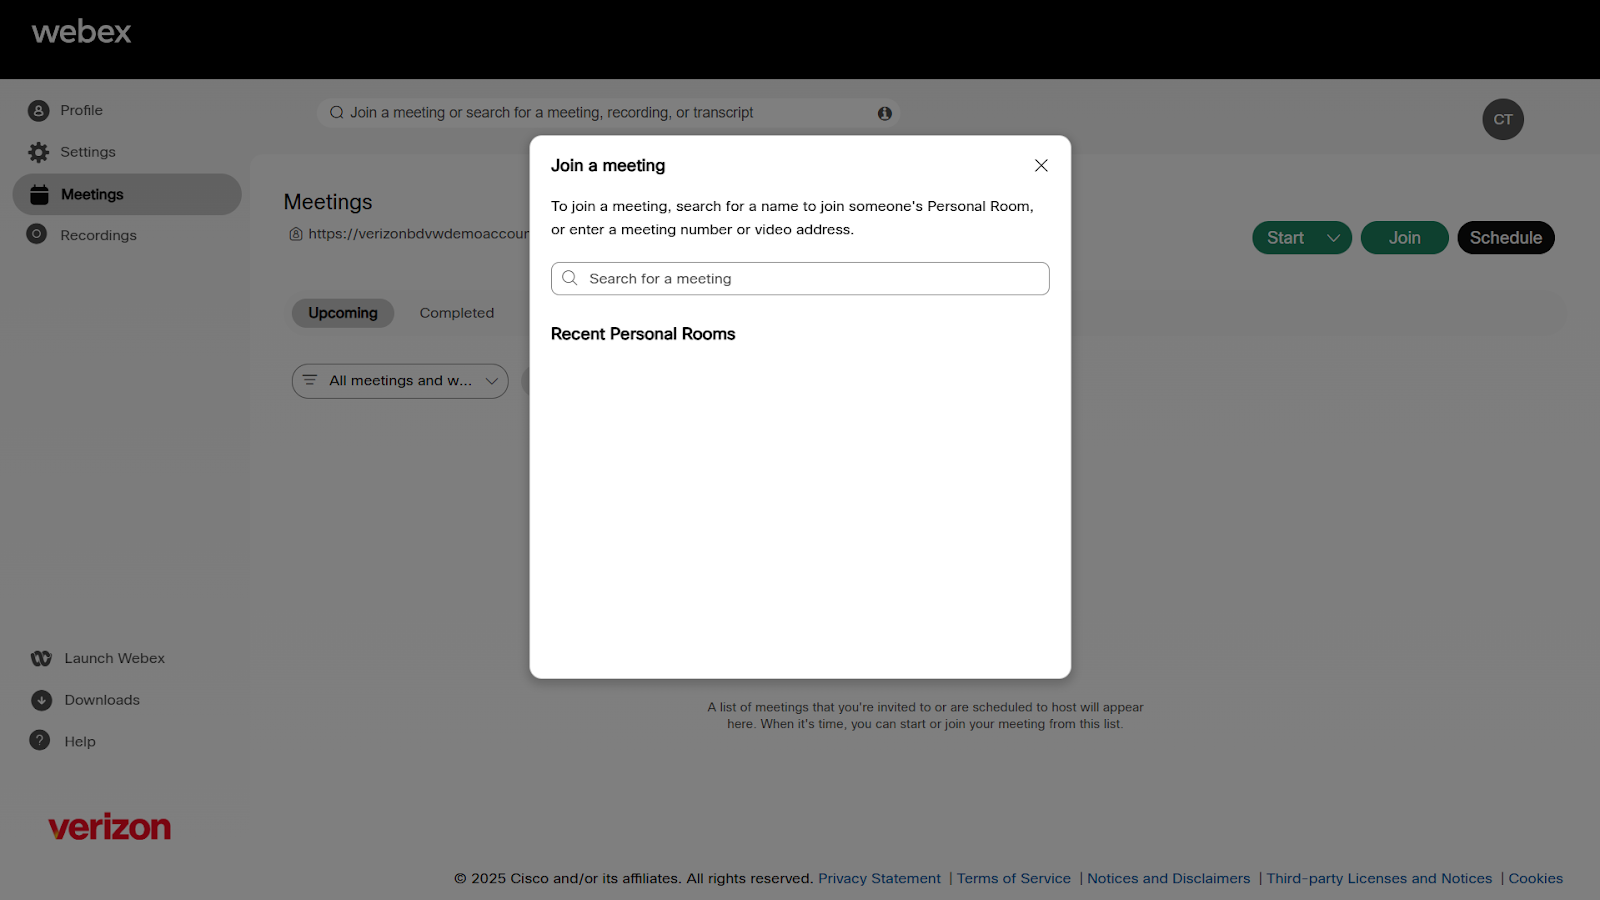
Optionally, use the search bar to join a meeting or search for a transcript.
To schedule a meeting:
- Click Meetings.
- Select Schedule.
- Select the Meeting type from the drop-down menu.
- Enter the Meeting topic.
- Choose a Date and time for the meeting. Check the box if this is a recurring meeting.
- Add Invitees.
- Specify the meeting agenda, if desired.
- Expand Security to specify a meeting password, join rules, or auto lock.
- Expand Audio connection options to choose a connection type or mute attendees.
- Expand Advanced options to see additional meeting settings.
- Click Schedule.
In User Hub, you can manage your voicemail settings, like when you want your voicemail to be active, message storage settings, and how you would like to be notified of new voicemail messages. You can also set up your voicemail greetings.
To access your voicemail settings:
- Sign in to User Hub.
- Click Settings > Calling > Voicemail.
Listen to your voicemail messages
You can listen to and download your voice messages from User Hub. When you have a voice message waiting for you, you’ll see an indicator under the voicemail tab within your calling settings.
- Under Voicemail inbox, click Manage voicemails.
- Locate and click on the voicemail you wish to hear. A drop-down will appear.
- Click the Play button.
- Your message will be played.
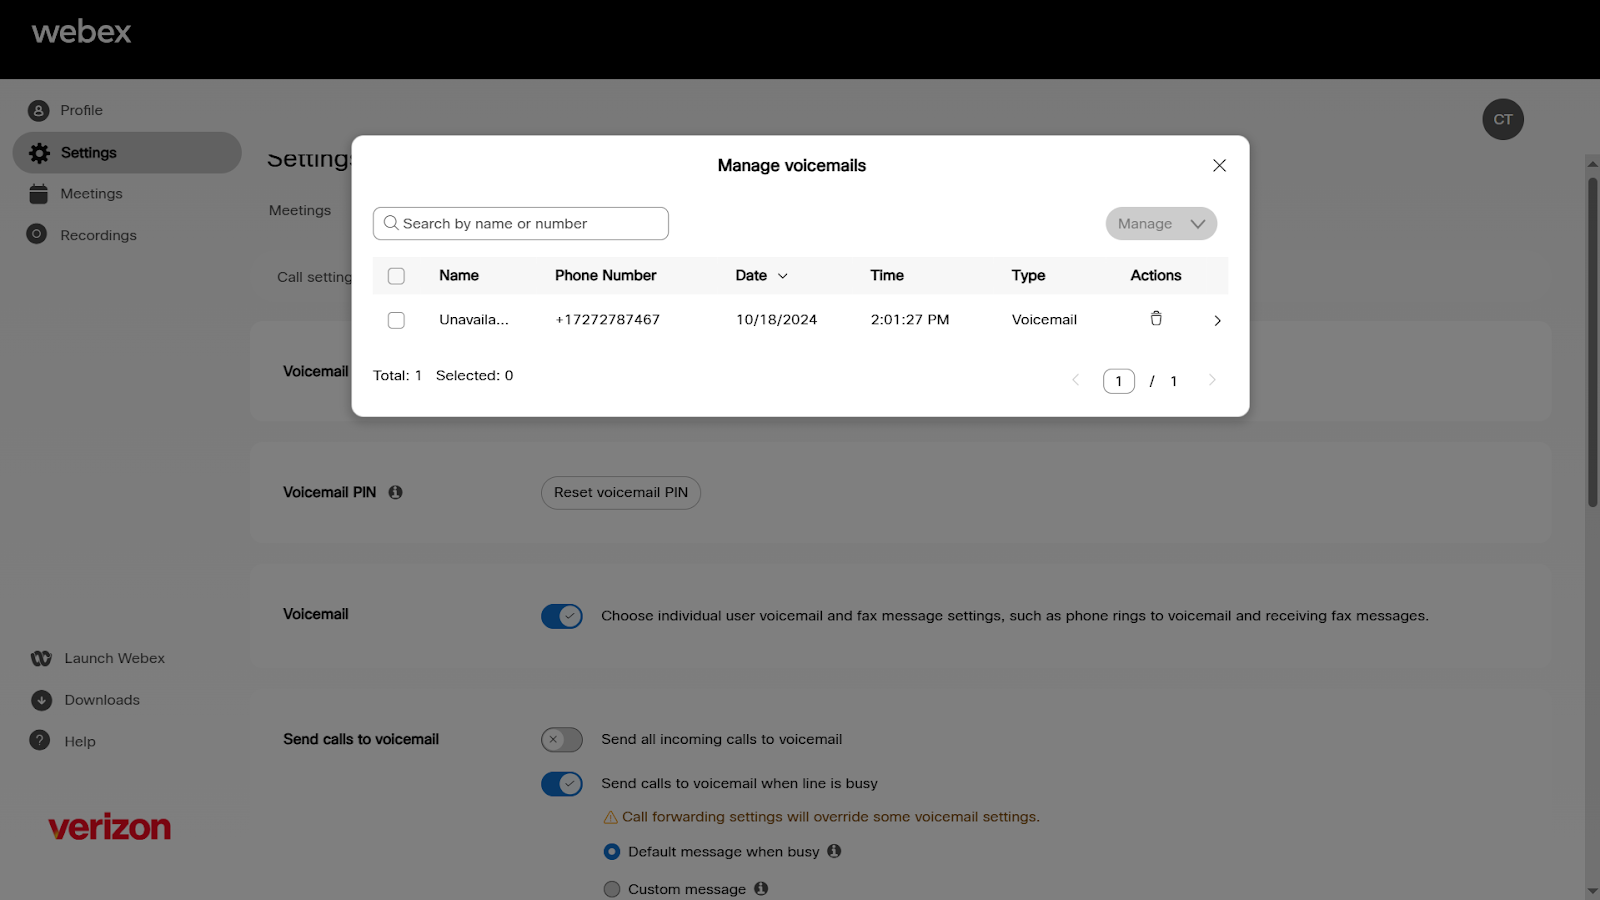
To download the voicemail message:
- Click the arrow next to the message.
- Click Download.
- The message will download as a .wav file to your computer.
Change your voicemail PIN
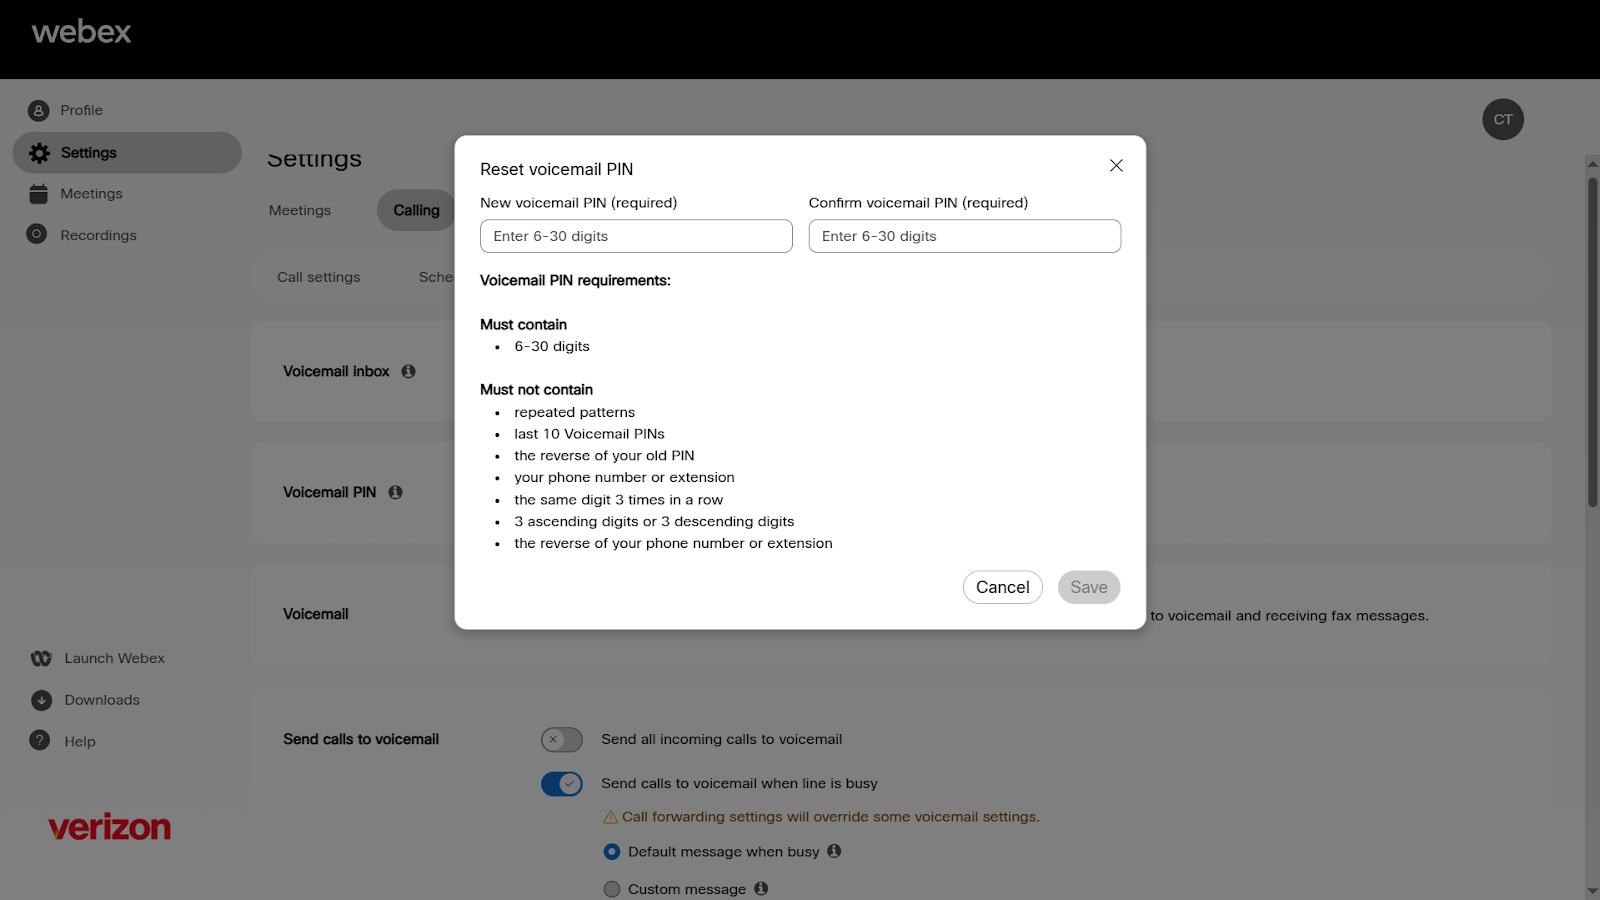
You can create a voicemail PIN if your administrator hasn't provided you with one, or change your PIN if you forget it at any time.
- Under Voicemail PIN, click Reset voicemail PIN.
- Enter your new PIN.
- Confirm your PIN in the appropriate box.
- Click Save when complete.
The PIN number must be between 6 and 30 digits.
Choose when to send callers to voicemail
You can set when you would like to send callers to your voicemail. For example, you may want to send all calls to voicemail when you know you’re going to be out of the office and not taking phone calls.
- Under Send call to voicemail.
- Choose when to have your calls sent to voicemail:
- Send all incoming calls to voicemail
- Send calls to voicemail when line is busy - If this option is selected, choose whether to have a default message played, or a custom message that you have created and uploaded from your computer.
- Send calls to voicemail when no one answers - If this option is selected, choose whether to have a default message played, or a custom message that you have created.
- Click Save when complete.

Allow callers to transfer from your voicemail greeting
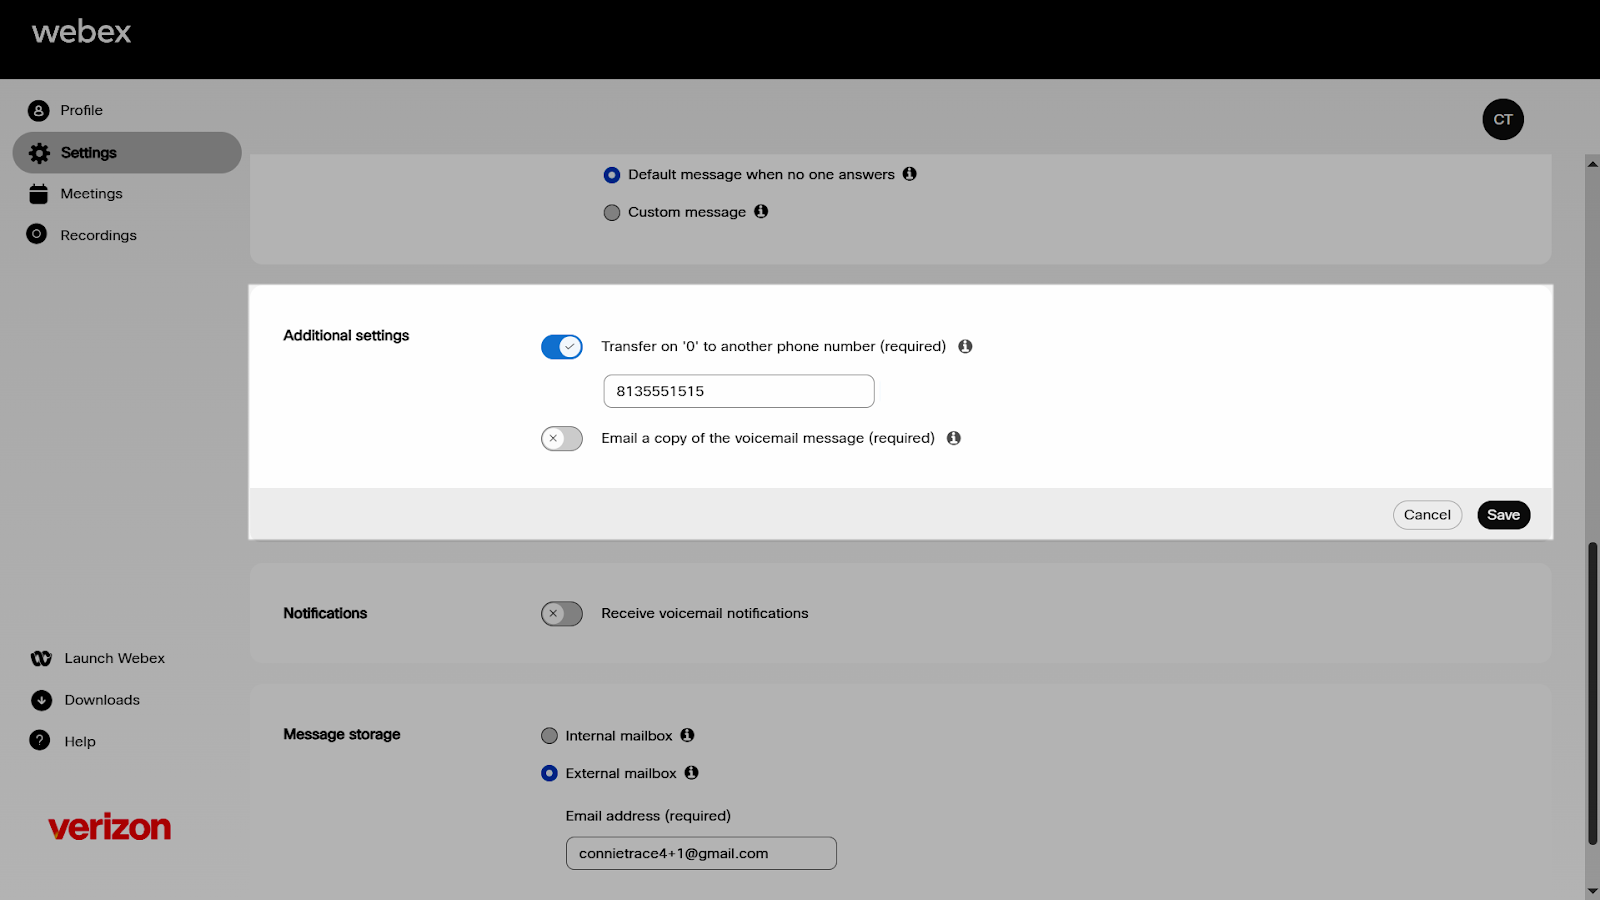
You can allow callers to press 0 and be transferred to another phone number, of your choosing, when they reach your voicemail greeting.
- Under Additional settings, toggle on Transfer on ‘0’ to another phone number.
- Enter a valid 10-digit number.
- Click Save.
Enable voicemail notifications
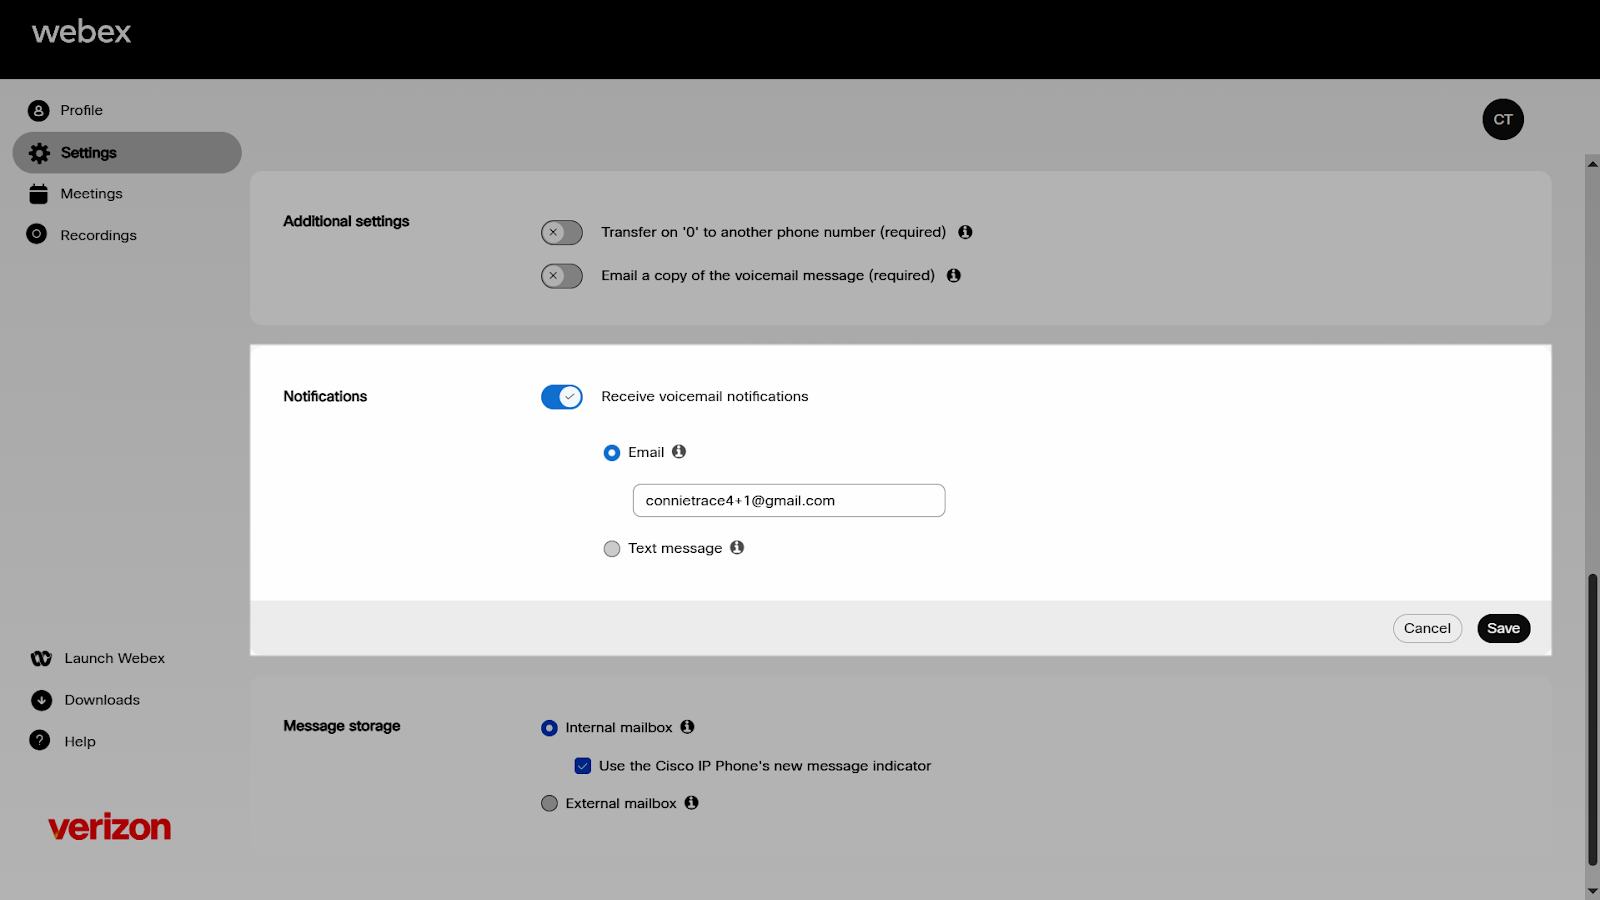
- Under Notifications, toggle on Notifications.
- Choose to enable the following notifications:
- To receive email notifications, select Email and enter a valid email address in the field.
- To receive text message notifications, select Text message and enter the phone number and service provider.
- Click Save when complete.
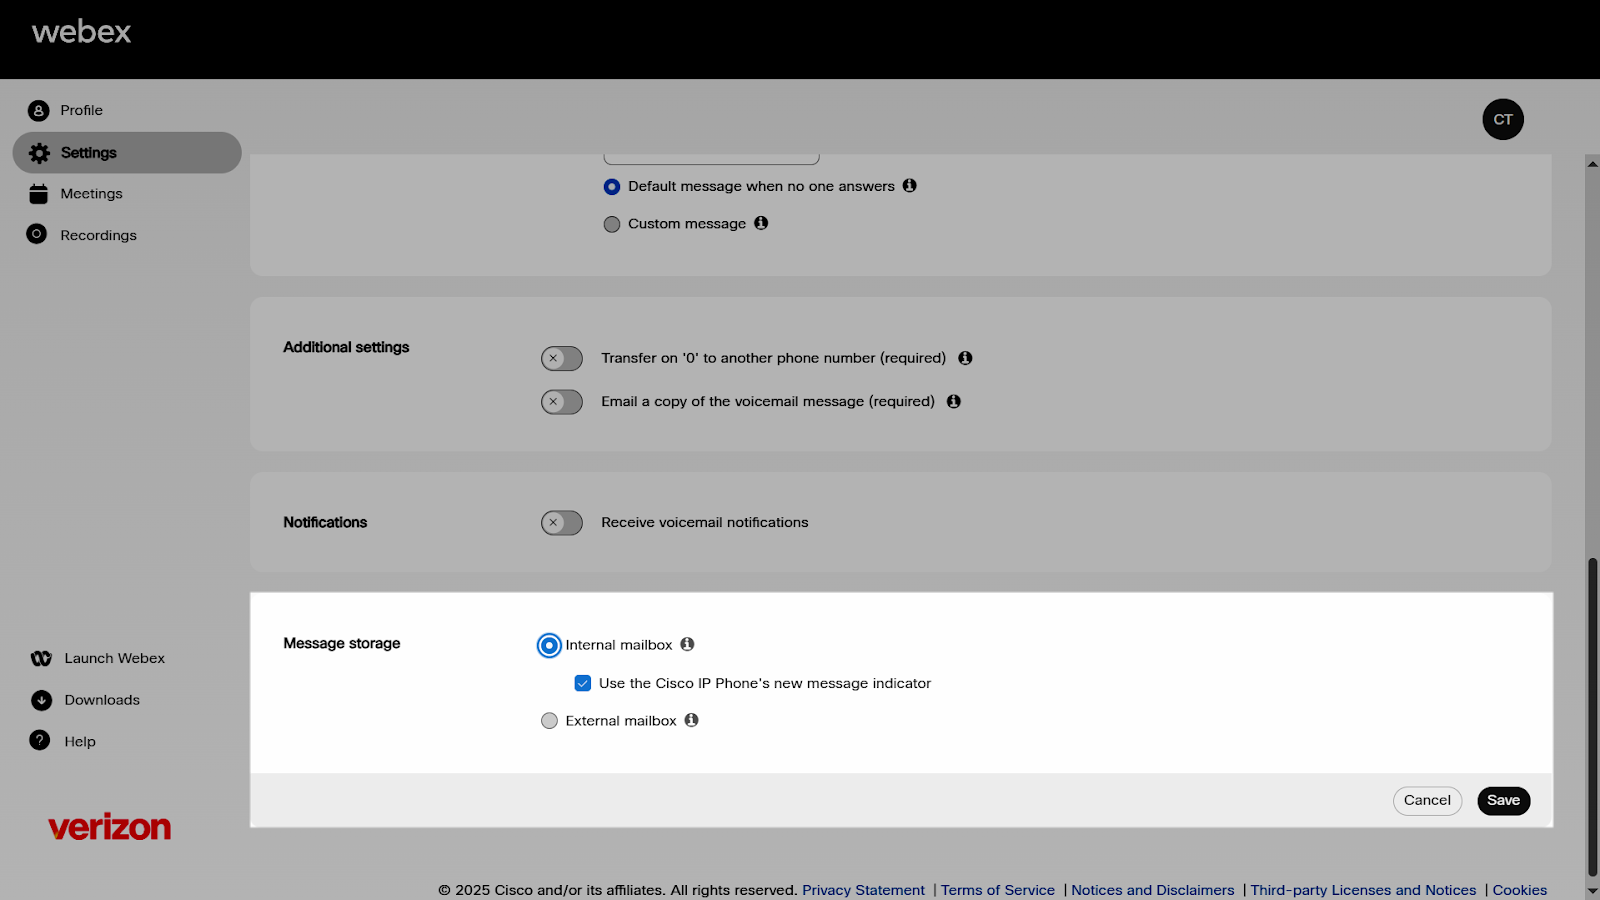
Enable message storage
You can choose where you want to store your voicemail and fax messages—in the User Hub or to a specified email address as a .tiff file.
- Under Message storage, you can choose:
- Use internal mailbox—This option allows you to access the voicemail from your phone or from the Webex Settings Portal. Select Use the phone's new message indicator check box to enable the message waiting indicator for your desk phone.
Note: The internal mailbox has the following storage limitations:- Single message limit of 10 minutes
- Total mailbox limit of 100 minutes
- Use external mailbox—With this option, you can enter the email address to which you want to send all the voicemails. If this option is selected, voice messages won’t be accessible from your phone, desktop app, and the user portal, and are not transcribed.
- Use internal mailbox—This option allows you to access the voicemail from your phone or from the Webex Settings Portal. Select Use the phone's new message indicator check box to enable the message waiting indicator for your desk phone.
- Click Save when complete.